Winter Project - Raking out my neck and new front end...
- Thread starter Moespeeds
- Start date


Moespeeds
Well-Known Member
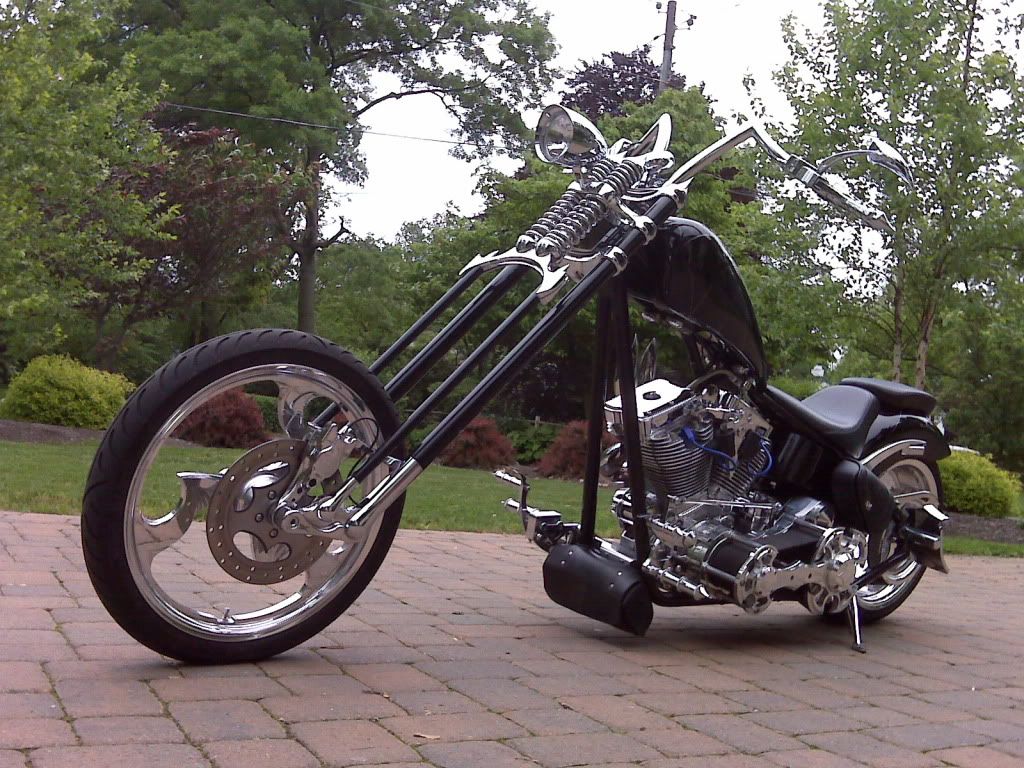
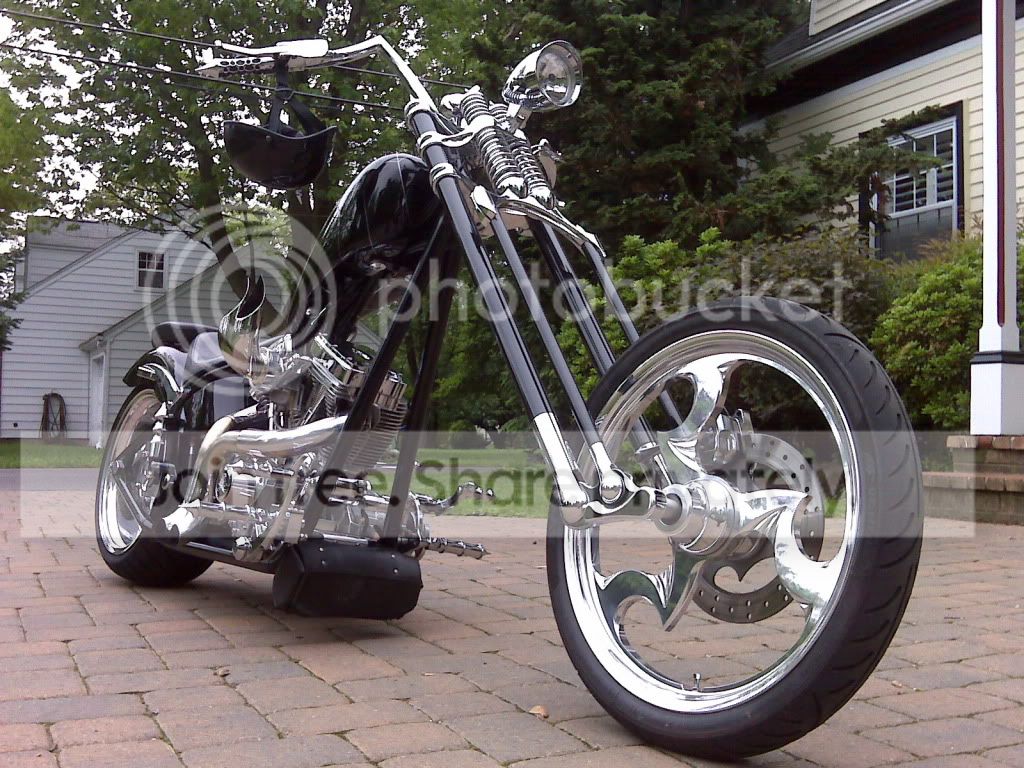
I got the handling all sorted out. Before I took it on a road test, I checked and double checked every bolt on the bike to make sure nothing would fall off. Well, what I didn't check is my tire pressure. My rear was dead flat, like 5 lbs in there, and the front was about 20. The scary thing is that my dumb ass took the thing to 70 MPH like that! Anyway, after putting air in the tires, it handles great. It does occilate at speeds over 70, but not a wobble, just a little rocking back and forth. I fixed a few little leaks and sorted out some loose wires behind the coils, and everything has been running great. I tried to get a HIEM for the front brake bracket, but they won't fit, there isn't enough clearance for the head. I'm going to keep an eye on it, and if it gets fishy, I'll make a bracket that bolts up to the brake so the HIEM will fit. Here's a pic I took today:
M
micky nettle
Guest
Fantastic front end, looks the bizzzzzzzzz. But where did you get that cool looking air intake.

newbie dog
Active Member
Damn...that's my dream front end Moe. Nice work. The only reason I've held back is people complaining about handling and the reliability of the American Dragon Suspension. I like to take my dog on loooong walks and so far I have no issues with my bike at all...I'm afraid I will open a pandora's box if I mess with the front end. Would you do it again?
Moespeeds
Well-Known Member
No problems on handling, springers are very neutral if you set them up right, no matter what your rake. Al had a problem with the brake bracket failing, and unfortuantely the way it's setup there is no room to use a proper HIEM so I'm keeping a close eye on it. It really looks sharp though and I'd do it again in a second. Electrical is great, beats the shit out of the EHC and mess of wires that BD uses stock. I like simple it's so much easier to work on and troubleshoot. Only thing I'd do different is I'd goto 50 degrees of rake, 46 wasn't enough!

4thHorsemen
Member
Damn Moe! That's freakin sick. You have my envy.


leandean99
Member
SABER COVERS
Alhall88, i cant seem to find those saber covers anywhere on the web. do u have a web site and price for the chrome covers?Looks good moe, frame looks pretty level. You should pick up some of those chrome saber covers for the fork legs, would look good with the black mamba finish.


alhall88
UAW
Here's a link, they are on the website under options and list for $75.00 a pc.
Bike Builders Bible
Bike Builders Bible
leandean99
Member
i went to the website, the top end seems to have a lip, is this used only for springer front end? i was thinking this just slid up under the bottom tree flush.
alhall88
UAW
The one pictured on the website is for the inverted front end but as shown on mine they do make them for the springer, just call Ted up.i went to the website, the top end seems to have a lip, is this used only for springer front end? i was thinking this just slid up under the bottom tree flush.

scubaman15
Well-Known Member
WOW sick !!! Love It ... stock seems lame now

Battery (+) to fuse.
Fuse to toggle.
Toggle to coil.
Coil to cone.
Ignition done.
_________________________________________
Fuse to brake switch wire.
Other brake switch wire to stop bulb wire.
Brake light assembly is grounded say. Or other combo setup if ground wire is used as ground, not the brake housing to fender to frame is ground.
Only use one brake light to the most [pedal] used, or get slammed from the rear.
Brake light done.
______________________________________
Toggle switch to hot side is ready for ign and running lights.
Run a wire up and back to the head and tail light. Tie that with the coil wire off the toggle. Lights come on the same time as ign.
Run the high beam wire with a male end. Have the low beam's end with the same male fitting. Light blows? Pull over, swap male wires and on down the road you go.
Running lights done.
_______________________________________________________________
Take a jumper band, tie a 15a fuse to the brass side of the hot side of the main fuse's brass side.
Take a wire, send it to the winker relay.
Tie left and right winks to the bar's left and right switches. This will take a more detailed wire layout or trump the winkers on and use hand signals. No wires to the winks.
Winks done.
______________________________________________
Bottom line:
A. You have 2 fuses, 1 toggle switch, 1 stop switch.
B. You don't have; horn/starter relay/start button/start wires/winkers/winker relay.
C. You have a push button at the starter. You have running lights, brake light, spare headlight, fake winkers.
________________________________________
Options:
Winkers/Horn:
Take an old feeler gauge(s). Bend the end so it has a slight V to it. Set a ground wire to the other end of the feeler. Zip-tie the feeler gauge so it is suspended off making any metal contact when mounted. You now have 3 blades for the right/left/horn buttons. All you are going to do is push the bent V onto the handlebar, make ground by completing that circuit. Your fingers pressing that individual blade are the horn and winker relay stabbings, so [manually] tap like a relay.
Home he don't need no switch is just a stab at the spring steel kind of kill switch.
Fuse to toggle.
Toggle to coil.
Coil to cone.
Ignition done.
_________________________________________
Fuse to brake switch wire.
Other brake switch wire to stop bulb wire.
Brake light assembly is grounded say. Or other combo setup if ground wire is used as ground, not the brake housing to fender to frame is ground.
Only use one brake light to the most [pedal] used, or get slammed from the rear.
Brake light done.
______________________________________
Toggle switch to hot side is ready for ign and running lights.
Run a wire up and back to the head and tail light. Tie that with the coil wire off the toggle. Lights come on the same time as ign.
Run the high beam wire with a male end. Have the low beam's end with the same male fitting. Light blows? Pull over, swap male wires and on down the road you go.
Running lights done.
_______________________________________________________________
Take a jumper band, tie a 15a fuse to the brass side of the hot side of the main fuse's brass side.
Take a wire, send it to the winker relay.
Tie left and right winks to the bar's left and right switches. This will take a more detailed wire layout or trump the winkers on and use hand signals. No wires to the winks.
Winks done.
______________________________________________
Bottom line:
A. You have 2 fuses, 1 toggle switch, 1 stop switch.
B. You don't have; horn/starter relay/start button/start wires/winkers/winker relay.
C. You have a push button at the starter. You have running lights, brake light, spare headlight, fake winkers.
________________________________________
Options:
Winkers/Horn:
Take an old feeler gauge(s). Bend the end so it has a slight V to it. Set a ground wire to the other end of the feeler. Zip-tie the feeler gauge so it is suspended off making any metal contact when mounted. You now have 3 blades for the right/left/horn buttons. All you are going to do is push the bent V onto the handlebar, make ground by completing that circuit. Your fingers pressing that individual blade are the horn and winker relay stabbings, so [manually] tap like a relay.
Home he don't need no switch is just a stab at the spring steel kind of kill switch.

Askar
Member