Stuck Fork Seals - help plz!

Energy One

JWScarab

Active Member
The bushing on the left in your upper picture - the one that "slides on the tube, but is seated in the lower leg" - that bushing had to be pressed into the lower leg during assembly. It presses into the leg when you pound the seal in. Actually, I used my PVC tool to press that bushing and large washer in first, then I came back and used it again to tap the seal in.

I'm wondering if the bushing OD was too large for the lower leg, and that why its seized into the lower leg. The press fit bushing isn't coming out. Now that I think about it, I did have to tap them in pretty good when I changed them last year.

I'll get a picture posted up when I get home tonight.
 

Th3InfamousI

Administrator
Staff member
The bushing on the left in your upper picture - the one that "slides on the tube, but is seated in the lower leg" - that bushing had to be pressed into the lower leg during assembly. It presses into the leg when you pound the seal in. Actually, I used my PVC tool to press that bushing and large washer in first, then I came back and used it again to tap the seal in.

I'm wondering if the bushing OD was too large for the lower leg, and that why its seized into the lower leg. The press fit bushing isn't coming out. Now that I think about it, I did have to tap them in pretty good when I changed them last year.

I'll get a picture posted up when I get home tonight.
The aluminum bushing on the left slides on the tube no press fit, it's held in place only by the OD of the copper bushing. The copper bushing fits in the recessed area on your tube its a split bushing so will clip right into its place. The two bushings have a washer between them and the bottom of the seal that's all she wrote. You shouldn't have had to press fit anything other than the seal.

I think you are onto something your bushings were not right If you had to press them through


Sent from my 831C using Tapatalk
 
Last edited:

Th3InfamousI

Administrator
Staff member
If the bushings were too big I'd say your sliders are probably shot. It probably wore the slider down and now using the right bushing would be like throwing a hotdog down a hallway. Ask someone about their ex-wife they will tell you it's just not right afterwards! Haha

Sent from my 831C using Tapatalk
 

JWScarab

Active Member
The aluminum bushing on the left slides on the tube no press fit, it's held in place only by the OD of the copper bushing. The copper bushing fits in the recessed area on your tube its a split bushing so will clip right into its place. The two bushings have a washer between them and the bottom of the seal that's all she wrote. You shouldn't have had to press fit anything other than the seal. I think you are onto something your bushings were not right If you had to press them through
I'm with you 100%. But when I slide the alum bushing over the tube from the top, then the washer - The alum bushing slides down and stops at the smaller diameter on the lower leg. Then it has to be pressed into that smaller diameter on the lower leg. So the alum bushing ID is loose on the tube, but the alum bushing OD pressed into the lower leg.

Now - reading your other 43mm, 41mm thing. I have an 2003 Chopper with the 41mm tubes - the dyna style tubes and such. I wonder if my bushings are different than the later model dogs? Maybe I pressed in bushings that were not supposed to be pressed in. I'll get a pic tonight! Im ashamed of the damage on the lowers tho, that will be in my pics..... oh well.
 

Th3InfamousI

Administrator
Staff member
I'm with you 100%. But when I slide the alum bushing over the tube from the top, then the washer - The alum bushing slides down and stops at the smaller diameter on the lower leg. Then it has to be pressed into that smaller diameter on the lower leg. So the alum bushing ID is loose on the tube, but the alum bushing OD pressed into the lower leg.

Now - reading your other 43mm, 41mm thing. I have an 2003 Chopper with the 41mm tubes - the dyna style tubes and such. I wonder if my bushings are different than the later model dogs? Maybe I pressed in bushings that were not supposed to be pressed in. I'll get a pic tonight! Im ashamed of the damage on the lowers tho, that will be in my pics..... oh well.
Yea sounds like you pressed in bushings that are not supposed to be pressed in. That was why I was like wait a minute because that seal is really the only thing holding it together other than the damper bolt at the bottom of the leg everything else needs to slide freely or else the fork doesn't move right.

I'd say the ride would have been a little stiffer!! Haha and probably why your seal was leaking after only 1 year.


Sent from my 831C using Tapatalk
 

Th3InfamousI

Administrator
Staff member
Ahh ..just figured it out! You pressed the upper bushing into the lower leg. Yea you are not supposed to do that. That upper bushing sits between the lower leg and the seal. Whoops

I am really Sorry man that is a very expensive lesson. Hate to bearer of bad news but I'd say forks are probably trashed.

I'm really surprised this thing didn't ride funny I would think It would stick going down the road.

Sent from my 831C using Tapatalk
 

JWScarab

Active Member
But it has to press in. It presses into the smaller diameter part of the lower leg. Then the seal presses in the larger step, then there is just enough room for the dust cap. I'll get a pic soon!
 

JWScarab

Active Member
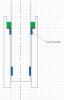
Here is my .xls sketch - haha. The green is the seal. The red is the washer. The blue is the bushings. So when dropping the upper bushing over the tube, it had to be tapped into the lower leg or it would not drop down. Then there was enough room to put the washer in, then seal, then just enough room for dust cap (not shown).

Seal.JPG
 
Last edited:

Th3InfamousI

Administrator
Staff member
Here is my .xls sketch - haha. The green is the seal. The red is the washer. The blue is the bushings. So when dropping the upper bushing over the tube, it had to be tapped into the lower leg or it would not drop down. Then there was enough room to put the washer in, then seal, then just enough room for dust cap (not shown).

View attachment 29648
I just did them and I'll be honest I'm not 100% sure if that upper bushing slides into the lower. However let's think about this.... I assume it doesn't because that aluminimum bushing has a bigger OD than the copper coated bushing and the copper bushing is supposed to be the "wear" bushing. Copper is a softer metal so its used on the interior of the slider so it doesn't jack up your sliders. When you wear the copper off it wears down your sliders. If you press the larger bushing into the slider how is the copper bushing going to wear at all?

No press fit anything other than the seal and it all fit in nicely.

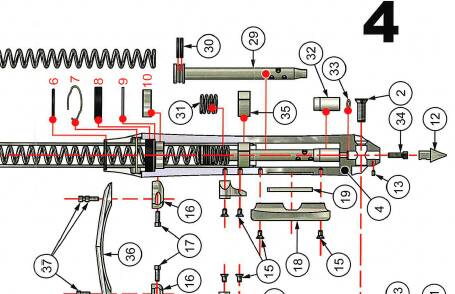
I hate this picture in the manual but it's all we got it doesn't really show you how it all goes together correctly but look at #10 that's the larger OD bushing. #35 is copper. It's hard to see but #10 sits on the lip. Rememember you said the seal was down 1" and Kaptain and I said that was too far? Seems like you pressed that bushing that wasn't supposed to be go that far.


Sent from my 831C using Tapatalk
 

JWScarab

Active Member
Sounds like everything went south on you.
I hate when that happens.
Your going to have to heat the leg to get the aluminum to expand and then use a freeze agent on the bushing to get it to release then one slam with the tube should knock it out.

Freeze Agent
Hey Curtis - if I heat the leg will I ruin the chrome?? I' m scared that I will discolor it.

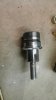
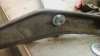
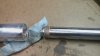
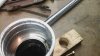
A couple pics - I cant see any other way it would assemble. The top of the bushing is flush with the step on the leg. The tubes slide up and down freely - but they do not move side to side at all. I think they have a very good fit to the bushings - as designed. The tubes do not have wear.

I'm thinking about trying to file off any burrs without removing the tubes. Then just putting in the new seals and see what happens. I did put a few nicks in the tube - but I think that area will be above the seal - so it wont tear the seal up. It may just work! If not, I will heat/freeze - as long as it doesn't ruin the chrome??

The last pic is the bottom of the leg. I dont know if these hidden axle lowers are factory BDM. My other 03 Chopper did not have a hidden axle lower - it was a visible axle with a pinch screw.

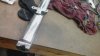
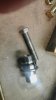
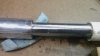
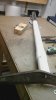
20160203_212552.jpg 20160203_194541.jpg 20160203_201324.jpg
 

Dragonslave

Active Member
It would definitely make life a little simpler but not much for what he is doing.
The older tubes BD legs kinda suck to work on because there is less room.

I would go at it in steps.
1) Freeze the bushing and then give it a few slams to see if she lets go.
2) Using one of the little butane torches, focus the tip of the torch at the seam between the bushing and the leg, as much on the leg side as possible, give it a few slams and see if she lets loose.
3)Freeze the bushing and then, using one of the little butane torches, focus the tip of the torch at the seam between the bushing and the leg, as much on the leg side as possible, it should cause the aluminum to expand just enough that it will break that bound and let it out.
Obviously if you super heat the aluminum you are going to have problems with the chrome but the small butane torch should not cause you problems.

I went through this once when I first started doing fork rebuilds.
Even made a tool that would hold the fork leg and pull the tube and all it ended up doing was pulling the lower bushing off the tube.
I thought I was losing my mind and what I ended up finding out was some knuckle had had used green loc-tite when they put the upper bushings in.
In the end the above procedure is what I started doing, with hard cases, and I haven't had an issue since.
 

JWScarab

Active Member
Thanks Curtis!!

This is a great help. I really appreciate that you took the time to help me!! At least I know I'm not losing my mind or doing anything wrong. I will do as you suggested. I'd like to get them apart, because then I really think I can clean up the burrs on the upper edge of the lowers (where I was prying). My fine craftsmanship that created all the burrs (ha) - those nicks will not show when the dust caps are on. If I get them apart, I will buy new tubes and if so I'll order them from you.

It may be 3-4 days before I reply back. Work function tonight and family stuff this weekend.

I do feel better! I don't regret D-I-Y, even tho it throws a curve ball once in a while!! I did adjust my valves last week - first time for me - very EZ!!

THANKS AGAIN EVERYBODY

Joe
 

Sven

Well-Known Member
Flat Rate:
34 = 6mm bolt
29 = Sanction tube
7 = Retain C- aclip
1. Hold leg in one hand, tube in the other = Snap pull-snap pull-snap pull until the seal walks out of the leg.
2. Hold old seal in a screwdriver shaft. Let it spin on a grinder so the OD is narrower, now falls in the leg.
3. Hold a thin, cut plastic baggie over the tube so you do not cut the lip of the new seal. Remove any plastic sheered off the baggie and is lodged in between seal and tube.
4. Hold old seal over new seal, use a cut to length pvc tubing over the fork tube, hammer the pvc at both seals, home the new seal just past the C-clip groove and install clip.
5. Hold leg assembly upside down, then pour required amount down the 6mm hole in the leg. With a paper towel, cone the corner, spray with brake clean, stick it down the 6mm hole and clean the oil off the threads in the leg and bolt threads. Use yamabond on the bolt thread and torque to spec.

Squid Time:
1. Removes top cap = flies across the garage and dings the part.
2. Remove spring.
3. Remove 6mm bolt.
4. Removes seal after noting retain ring was holding shit up.
5. Installs seal without a condom over the tube, cuts the new seal up.
6. Installs bolt without sealer and now oil seeps out.
7. Install top cap, cross-threads the tube after 3 attempts of picking up the cap off the floor.

That's basically how a fork seal is replaced by a flat-rater and squid.
 

JWScarab

Active Member
Ain't this some shit!!!!! All is going well.....until the fucking end!!! I'm over it tho. Fuck it. I guess I'm buying a new front end only because I had a fork seal leak.

I tried the heat on the outer, and freeze off on the bushing. No luck. I do believe this works on most, but not on mine. What else can I do? So here goes. I come up with an ingenious idea!! lol. I'll design a puller. Actually the puller worked great and I do recommend it for use to anybody when pulling seals.

First I buy a bolt that will stick up thru the top cap.

20160213_163032.jpg 20160213_163046.jpg

Next I screw the top cap on the the tube

20160213_163106.jpg

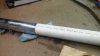
Next I slip a piece of 2" PVC on to the tube - cut just to the right length that the bolt sticks out the top - but make sure you have a lot of threads still inside the pipe too - so you can "pull" as you tighten the nut....

20160213_163206.jpg 20160213_163227.jpg

Next I slip a piece of heavy steel over the bolt (a bumper bracket from a 1969 mustang works well), then a washer and a nut

20160213_163318.jpg 20160213_163338.jpg

Lastly you tighten the nut, and as you do it pushes the PVC down against the lower leg - and forcing them apart!!! It worked great!!! I am a 250lb guy and it took a lot of might. A breaker bar helps a lot. I get excited and immediately do the other leg - it works great too!! But again, it took all my might.

So what is the issue?? Why am I frustrated?? What the fuck could go wrong???

I look at the lower part of the tube and I notice the upper busing is missing....

20160213_163407.jpg


Its STILL IN THE FUCKING LOWER LEG - FULLY SEATED!!!!!!! ON BOTH LEGS!!!!! Instead of the lower bushing pushing the upper bushing out as it should, the lower bushing on the tube actually slid thru the upper bushing, leaving the bushing in the lower leg.

20160213_163518.jpg

Now, somebody please help me. Those bushings ain't fucking coming out. I need new lowers for an 03 chopper so I don't have to ride all summer on one wheel.
 
Last edited:

woodbutcher

Mr. Old Fart member #145
Staff member
sounds like it is time for a Sugar Bear or maybe an American Suspension springer front end. might even could use a Pauco springer.
 
Top