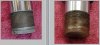
Inverted forks 02 Pro Sport Need Help.
- Thread starter Ernie12
- Start date


 , thanks for helping me out, for when I get around to doing the set I have to do.
It has sealer on the threads. I think it calls for a Teflon thread sealant.Ah, the old tube out of the leg. Maybe I was loopholing a step? Not familiar with the teardown to think out a loophole.
Edit: Now that I see said design, no loophole possible, sans scratch up the leg. Brake clean every part, threads included. Why? The debris at the bottom of the fork... Is it powdered gray aluminum (normal wear)? Or is it deterioration of the slider collar fiber, brass this or that going belly up.
No problem Shannon, Thanks for the heads up on aligning the forks. I was concerned about it before I started.
I just noticed the inside of the dust cap that screws on over the seal is really messed up. I don't want to put this back together like this so does anyone know where I might get a replacement?
I just checked the other one still on the bike and its messed up also. They are easy to unscrew no force at all so I guess its just age from sitting. Its just a hard plastic and its just falling apart.
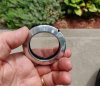
Inside....
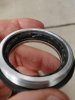
I just checked the other one still on the bike and its messed up also. They are easy to unscrew no force at all so I guess its just age from sitting. Its just a hard plastic and its just falling apart.
Inside....
Well I could just take that piece of plastic out and then put them back on that way it would look nicer.Those are more like finished off beauty rings and pre=seal=cleaners. Look race and leave them off = Less friction.

pauldeepsea
Guru
Unfortunately mean street when out of business, not sure if it’s something that is common and may be able to get from jp cycles ?I just noticed the inside of the dust cap that screws on over the seal is really messed up. I don't want to put this back together like this so does anyone know where I might get a replacement?
I just checked the other one still on the bike and its messed up also. They are easy to unscrew no force at all so I guess its just age from sitting. Its just a hard plastic and its just falling apart.
View attachment 59247
Inside....
View attachment 59248
I think vicious cycle works use to carry mean street forks , maybe they have some spares parts left?
Good luck
Sent from my iPhone using Tapatalk
The beauty ring could go back on without the rubber = Less friction. This is where the Meguyveer in me says, 'what's my fix?' So being fixated on Amazing Goop glue, that's my backing. My rubber insert is from say a windshield wiper blade. Crazy glue would tie the ends of the rubber together.
Not rubber, Well it is a rubber type plastic I guess. Its basically just a wiper seal.The beauty ring could go back on without the rubber = Less friction.
Last edited:
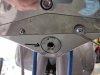
This would be the perfect time to repack the front end:
1. Someone may know the top nut torque, that or set the clicker on the torque wrench the other way, start a 45 pounds and run 10 pound increments from there until it breaks loose = 70+ is close enough say.
2. First grab the upper and lower and see if the upper and lower are locked together or both fling either way. The next is a vertical pull to you with the bottom crown held and the top crown held, where the top is pushed away in the vertical feel of it. The loose crowns mean nothing if loose. The feel for the bearings to have a knock to it is not.
3. Before the disassembly, is the top crown stable and unmovable having the nut still tight? That should be a solid mount. The allen hex at the bottom of the crown, see if the lower crown is loose and how you are describing the bottom crown, right? Just tighten the allen hex and this now should be bolted down as solid as the upper crown.
4. Now break the top nut and remove the upper crown. There are a few styles of holding the lower crown's stem from the top. Most normal will be a threaded stem that will have 1 or 2 locking rings. There might/might not be a center tab ring that locks both lock rings. You just bend the tab that holds the upper lock ring to clear the ring. The less bend, the more it can be used rather than break off if you sent the tang horizontal.
5. Brake clean the bearings. Take a plastic sandwich bag, scoop a spoon full of grease and finger it off inside the corner of the baggie. Set the clean bearing in the corner of the bag with the grease, squeeze the grease in the bearing... one down. Prick a toothpick size hole in the corner of the bag with the remaining grease. Squeeze and circle around the cleaned races and wipe the surface of the races. Run a bead over the clean front axle and leave a light coat on the entire shaft, threads, and set aside.
6. Before assembly, we didn't find the indents in the races to be deep, just showing a shadow, right? Because the front end usually swung from lock to lock and never centered itself, as in dropping into the race's indented pocket, right? Centering bad {change out}, swing lock to lock good [still serviceable].
7. The assembly theory walks something like this:
a. The lower crown has all the play out of it, no knock, no up and down movement, and swings from lock to lock without bind.
b. The upper crown is installed. The nut is installed. One fork is installed up both crowns and one pinch bolt tightens the fork from moving.
c. The top nut is torqued to spec. The top crown moved down by itself, be the loose top crown pinch bolt, or the loose lower crown pinch bolt [if used]. This still floats the crown down on the bearing load. This does not bind the top crown, but remains static at both ends. Now once again, move the whole triple from lock to lock and see if that was too much bind on the bearings. Get it?
d. Drop the fork or if say you pinched the lower crown to send the upper crown home, pull the top crown off and back the lock ring off ever so much and test torque again. Or, don't be so anal and tap both lock rings together because you do not need much. No doubt there is a feel for it so just remember no bind, no knock, but somewhere in the middle.
e. The straight front end is to unpinch the one bolt and if the fork drops out of the crowns... Nice! Now that the bearings are packed and set, the one fork can be torqued to spec to the crowns. The other fork is going to need the axle and this is where you float the second leg to the axle to thread hole, where you can hand spin the axle once the second leg is torqued to spec and that is as static square as it gets... Done.
1. Someone may know the top nut torque, that or set the clicker on the torque wrench the other way, start a 45 pounds and run 10 pound increments from there until it breaks loose = 70+ is close enough say.
2. First grab the upper and lower and see if the upper and lower are locked together or both fling either way. The next is a vertical pull to you with the bottom crown held and the top crown held, where the top is pushed away in the vertical feel of it. The loose crowns mean nothing if loose. The feel for the bearings to have a knock to it is not.
3. Before the disassembly, is the top crown stable and unmovable having the nut still tight? That should be a solid mount. The allen hex at the bottom of the crown, see if the lower crown is loose and how you are describing the bottom crown, right? Just tighten the allen hex and this now should be bolted down as solid as the upper crown.
4. Now break the top nut and remove the upper crown. There are a few styles of holding the lower crown's stem from the top. Most normal will be a threaded stem that will have 1 or 2 locking rings. There might/might not be a center tab ring that locks both lock rings. You just bend the tab that holds the upper lock ring to clear the ring. The less bend, the more it can be used rather than break off if you sent the tang horizontal.
5. Brake clean the bearings. Take a plastic sandwich bag, scoop a spoon full of grease and finger it off inside the corner of the baggie. Set the clean bearing in the corner of the bag with the grease, squeeze the grease in the bearing... one down. Prick a toothpick size hole in the corner of the bag with the remaining grease. Squeeze and circle around the cleaned races and wipe the surface of the races. Run a bead over the clean front axle and leave a light coat on the entire shaft, threads, and set aside.
6. Before assembly, we didn't find the indents in the races to be deep, just showing a shadow, right? Because the front end usually swung from lock to lock and never centered itself, as in dropping into the race's indented pocket, right? Centering bad {change out}, swing lock to lock good [still serviceable].
7. The assembly theory walks something like this:
a. The lower crown has all the play out of it, no knock, no up and down movement, and swings from lock to lock without bind.
b. The upper crown is installed. The nut is installed. One fork is installed up both crowns and one pinch bolt tightens the fork from moving.
c. The top nut is torqued to spec. The top crown moved down by itself, be the loose top crown pinch bolt, or the loose lower crown pinch bolt [if used]. This still floats the crown down on the bearing load. This does not bind the top crown, but remains static at both ends. Now once again, move the whole triple from lock to lock and see if that was too much bind on the bearings. Get it?
d. Drop the fork or if say you pinched the lower crown to send the upper crown home, pull the top crown off and back the lock ring off ever so much and test torque again. Or, don't be so anal and tap both lock rings together because you do not need much. No doubt there is a feel for it so just remember no bind, no knock, but somewhere in the middle.
e. The straight front end is to unpinch the one bolt and if the fork drops out of the crowns... Nice! Now that the bearings are packed and set, the one fork can be torqued to spec to the crowns. The other fork is going to need the axle and this is where you float the second leg to the axle to thread hole, where you can hand spin the axle once the second leg is torqued to spec and that is as static square as it gets... Done.
Ok back to the forks.
I have been scratching my head about how to get the lower bushing out of the tube without damaging anything. So I came up with this kind of home made solution. I bought a seal driver kit from Harbor Freight and sanded down one of the rings so it would fit all the way down the tube ( it narrows down in the middle that is why you cannot use the slide hammer motion) and hopefully catch on the edge of the bushing. I taped a piece of PVC to the handle and after sanding and sanding it finally went all the way to the edge of the bushing and with two taps it popped out. SUCCESS!
I will try this on the other tube to see if I can pop out the seal and the bushing all at once.
See the bushing on the end.
Update: I did get the bushing , washer and seal out of the second one all at once using this method.
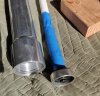
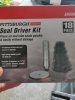
I have been scratching my head about how to get the lower bushing out of the tube without damaging anything. So I came up with this kind of home made solution. I bought a seal driver kit from Harbor Freight and sanded down one of the rings so it would fit all the way down the tube ( it narrows down in the middle that is why you cannot use the slide hammer motion) and hopefully catch on the edge of the bushing. I taped a piece of PVC to the handle and after sanding and sanding it finally went all the way to the edge of the bushing and with two taps it popped out. SUCCESS!
I will try this on the other tube to see if I can pop out the seal and the bushing all at once.
See the bushing on the end.
Update: I did get the bushing , washer and seal out of the second one all at once using this method.
Last edited:
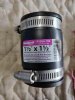
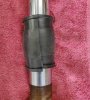
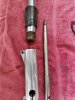
Well it took some time to get the other lower off the tube. I had to make a soft jaw for my bench vice. I just went to HD in the Pluming dept. and bought a rubber drain connection. Its very thick rubber so it worked very well. Just cut in down the middle and wrap it around the tube and put it in your vice. Tighten it very tight to keep it from spinning but it did still spin some. So you clamp it in the vice and use some heat , then use your axle to try and turn the lower part and hopefully it will turn. After I got it off I found out why it was so hard to come off.

BigDogRick
Well-Known Member
Fernco coupling saves the day again. Most people who say that are plumbers with a pipe connection that needs to be flexible - but, hey, a solution is a solution. Man, Ernie, following this post makes me glad I do not have those "superior" inverted forks. Wow! maybe when you're done rebuilding them they will turn out to be as good as the hype says they are. I certainly hope so.
Rick I hope so to and after I got the bottom off I was able to use the seal driver on the extension that I made and knocked out the bushing , washer and seal all at once. Cant say its been fun, but it has been interesting. I may take the aluminum part of the tubes and get them re-chromed. No matter how may times I wiped them down or polished them they always looked dirty and dull.