
Normally, what I have done in the past, is if your ordering from Wild Steed Worx or HDM, I send it to them, and they throw it in the box. I'll look into it. What town will it be going to?



I thought you made a disc for the tank cap and that I could buy it from you. KROSNO 38-400 POLANDNormally, what I have done in the past, is if your ordering from Wild Steed Worx or HDM, I send it to them, and they throw it in the box. I'll look into it. What town will it be going to?
In your experience, is it better to use a flat O-ring or a round one?I thought you made a disc for the tank cap and that I could buy it from you. KROSNO 38-400 POLAND
The ring I make is glued on with black silicone, after sealing the paint to the tank. Any rubber oring will start to leak again.In your experience, is it better to use a flat O-ring or a round one?
Please send a few photos of your disc.The ring I make is glued on with black silicone, after sealing the paint to the tank. Any rubber oring will start to leak again.
I do make the rings, but I've never actually mailed anything over sea.

Look @ the previous page. Pics of them installed.Please send a few photos of your disc.
It's just a flat piece of 316 ss, slightly curved to fit the top of the tank. It's then polished to a shine and glued to the tank.. I'll see if I can find some more pictures.What I'm actually interested in is the underside of the disc. It isn't visible in the photos.
Thank you very much. I have one last question. Do you seal it afterwards with an O-ring or a flat gasket?It's just a flat piece of 316 ss, slightly curved to fit the top of the tank. It's then polished to a shine and glued to the tank.. I'll see if I can find some more pictures.
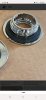
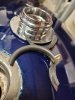
Here's the instructions I send out with it, maybe it will help you understand how it works.What I'm actually interested in is the underside of the disc. It isn't visible in the photos.
The rubber gaskets are the problem in the first place. The paint needs to be sealed to the metal tank, to keep the fumes from getting under the paint.Thank you very much. I have one last question. Do you seal it afterwards with an O-ring or a flat gasket?