

gearsmithy
Active Member
Let me start off by saying I'm broke and wish I could contribute to this board financially. Instead I figured I'd share some knowledge with the good people on this board.
Some of you may recognize this from my posts on another board, but I think it's worth it to put this up here as well. I hope this inspires some of you who are interested in dipping your toe in the fabrication pool. My goal with this was to demonstrate that it doesn't take a multi-million dollar machine shop to produce custom parts. That said, I don't think this piece would be appropriate for a big-dog motorcycle but with a little creativity, a lot of spare time and some attention to detail you can produce just about anything with very simple tools. Now for my build this part required some welding, but you could just as easily make this bracket (or something way cooler) without having to weld a thing.
Anyway here goes...
First let me qualify this by saying I'm not a professional machinist and have no aspirations to be one. My fabrication skills are 100% self taught so I probably have some unorthodox ways of doing things but hey...they work for me. One of the most important aspect of fabrication is design layout. I learned how to do this through trial and error and watching people more skilled than I am make things in a fraction of the time it would've taken me. First, let's talk about some basic layout tools.
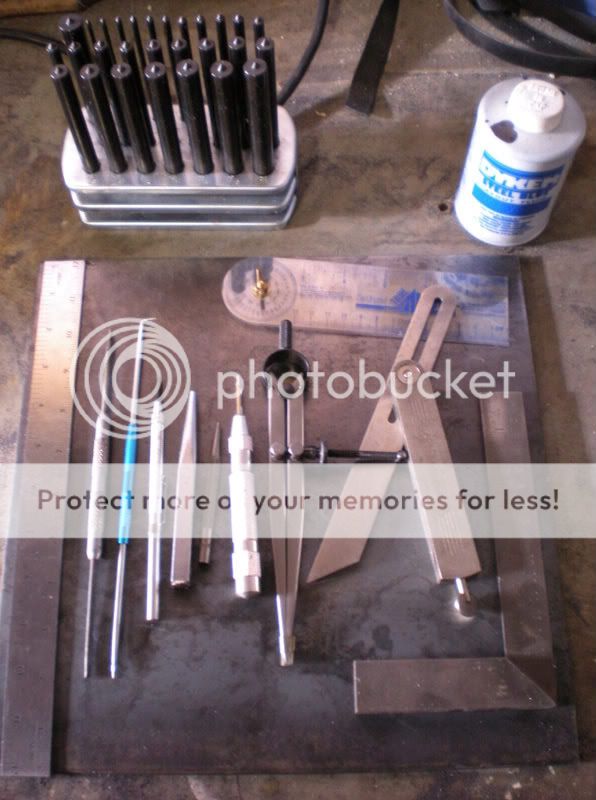
From bottom left to right->
The first item is (obviously) a ruler. If you don't know what a ruler is by now you shouldn't be building bikes...in fact, go buy yourself a helmet and some water wings just in case.
The next three items are scribers, they are used to mark or "scribe" lines on your workpiece. The first two scribers are your typical straight and 90 degree steel scribers, the third one is carbide-tipped and tends to hold a sharp edge longer than steel. One note about scribers, these need to be pretty sharp to maintain line integrity and ensure an accurate edge. While you can sharpen these on a bench grinder, you really should chuck these up in a lathe to ensure that the point is as close to center as possible (makes for more even lines). If neither of these are an option you can get them with replaceable tips (like my carbide scriber) and just order new tips as they dull with use.
The next three items are some basic center punches. These tools are used to make small indentations in the workpiece indicating the center of a circle (hence the term "center-punch"). Commonly these are used to mark drilling locations or to scribe a circle with the use of dividers (discussed below). Using a center punch properly is a skill in and of itself. Typically you will have an intersection of two scribed lines that you can feel with the punch when locating the proper position for the tool. Once you have the tool in position you TAP it with a small hammer (do not strike the tool as this can create an unnecessary large indentation and damage your work piece and/or punch). The third center punch is spring loaded and doesn't require any tapping to produce the indentation. Personally, I'm not a fan of the spring loaded punches because they require you to exert force against the tool to trigger the punching mechanism, which can cause the tool to shift out of position from time to time.
The next tool is a pair of dividers. These are similar to a compass in that they allow you to scribe circles or replicate precise distances to maintain part symmetry. There are several different kinds of dividers but I prefer the springloaded kind (shown here).
The next 3 tools are (in order) a t-bevel, protractor, and a square. The t-bevel is most commonly used for finding and transferring angles. The armature on the tool is adjustable and can be locked into place allowing you to transfer an angle from one part to another or from one area of a part to another. While the t-bevel is used to find angles, the protractor is used to measure them. This can come in handy from time to time and you may find yourself using these two tools more often than you think. The machinist's square on the far right is used to mark 90 degree angels. These tools typically have a thicker part (like the one shown) that is cut at 45 degrees allowing you to mark 45 degree angles as well.
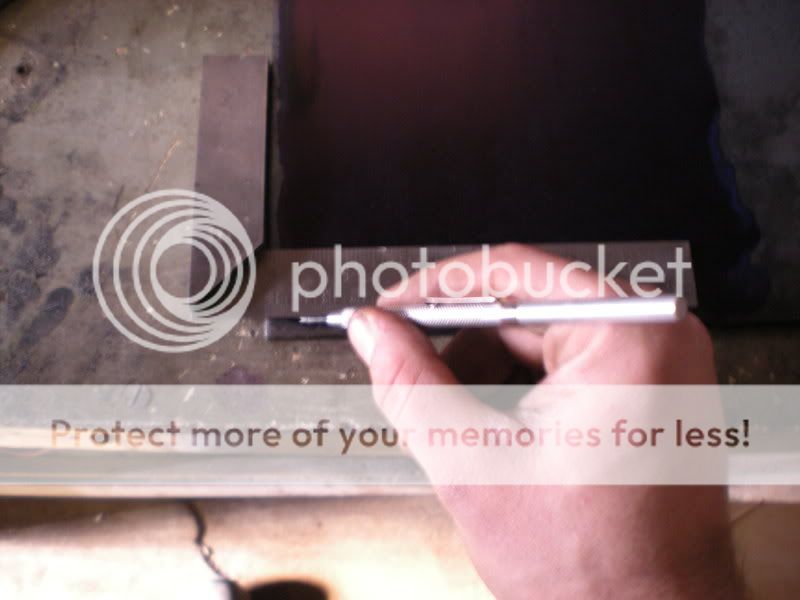
In the upper left hand corner are a special type of center punch called "transfer", or "through" punches. You might notice that these have a significantly different shape than the center punches and that's for a very good reason. These are used to find/transfer the center of an *existing* hole. To use these tools you find the correct size punch that fit's into the hole you're trying to transfer and tap them, in the same way you would use a center punch. You'll notice that they have small, very shallow points at the end of a consistent cylinder, this is to allow you to find the center of a relatively shallow hole. Because these punches are used to find the centers of existing holes, they *must* be sharpened on a lathe unless you are confident that you can grind these precisely by hand (in which case you have some serious skills and need to be working for NASA or something).
Here's an example of how I used these on to fabricate brake bracket for my current build project. One of the calipers I bought came with a bracket from a Ducati. I obviously couldn't use the supplied bracket on my bike since it was for a larger axle and a smaller rotor. In order to get the mounting holes correct, I used through punches to transfer the hole locations to my bracket. The procedure for this was as follows:
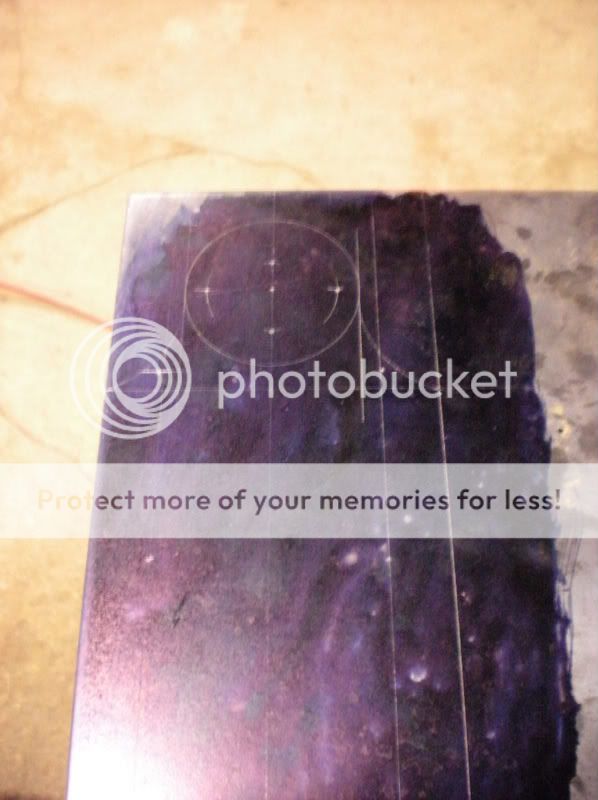
1. I located the distance from the center axle that I wanted the calipers to be at and scribed this radius with the dividers.
2. using a center punch I marked the location of the first hole and then used the dividers to mark the outside edge of the part from this hole.
3. Next I drilled the hole to the proper size, starting with a very small bit and working my way up to the desired hole size.
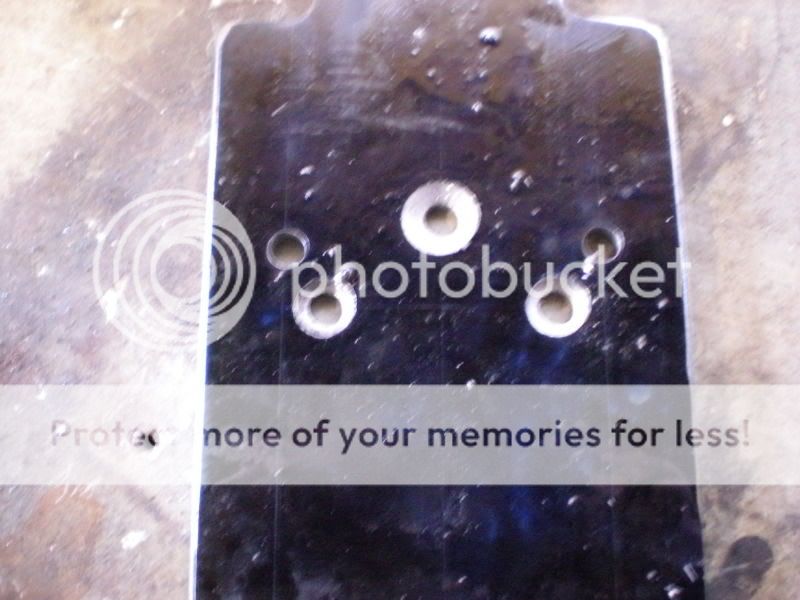
4. I bolted the original brake bracket to my unfinished part through the hole i just drilled and using a through punch that just fit through the hole on the brake bracket, I located my radius and marked the location of the second hole. In the picture below I have already marked and drilled the holes but you get the idea.
he last tool I'm going to go over is steel blue. This is basically an ink that is used to color your workpiece so that you can see your scribed lines better. Until recently I just used a black sharpie to accomplish the same task but you can get a much clearer line using the steel blue. I like to lay down a nice thick coat (about 1/64th of an inch) because this stuff has a tendency to rub off if you handle the part a lot (and this problem is only expedited by the use of cutting oil/or some other lubricant in your fabrication activities).
Now that we've got a basic understanding of how these tools work, let's put some of them to use to fabricate a license plate mount.
The first step is to come up with a design you like. Here you can see the design I came up with ; which was a highly technical process of stealing the license plate off of my other bike and tracing it out with a pencil onto a piece of scrap plywood.
I'm planning on mounting a remote oil filter underneath this bracket along with a stash tube for my registration (assuming I can even title this monstrosity). I've also laid out a section for the tail light.
Next, I measured for the approximate overall size of the bracket and found a piece of scrap plate steel that I could work with. Once I had my plate, I brushed on a nice even coat of steel blue and waited for it to dry.
Now that the ink is dry I used the machinist's rule to mark the bottom edge of the part. It's common practice to make all measurements on a part relative to baseline or point (this helps promote accuracy and becomes more relevant when you start playing in the .005" world). Needless to say we have some pretty significant tolerance in the part since we're making a license plate bracket and not a camshaft. Nevertheless the edge of my scrap plate had a slight curf on it from when I last cut it and I wanted to have a nice straight line to work from. Then using the tools listed above I proceeded to transfer my design from plywood to metal.
Then I used a jigsaw with a bi-metal blade from home depot to cut off the excess steel. I then used a $10 angle grinder from harbor frieght with a cheap flapper disk to clean up the edges.
Now it's off to the drill press to make some holes.
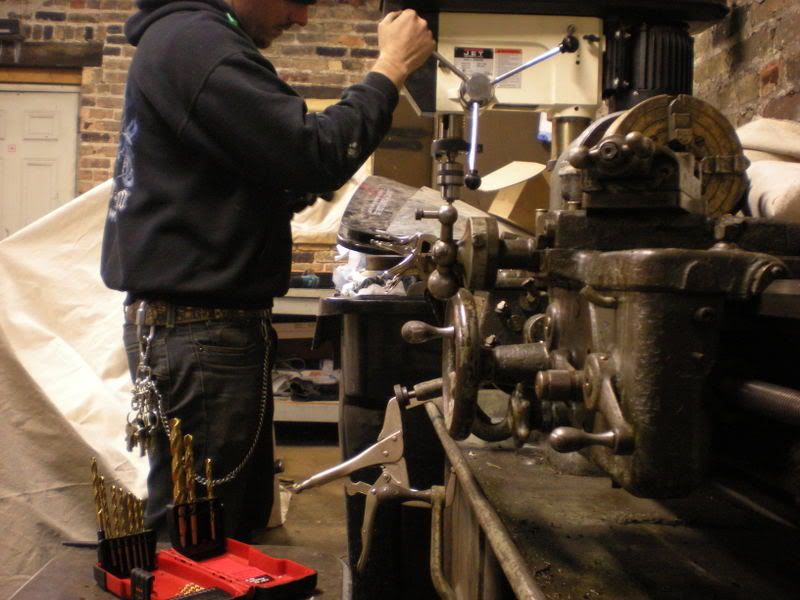
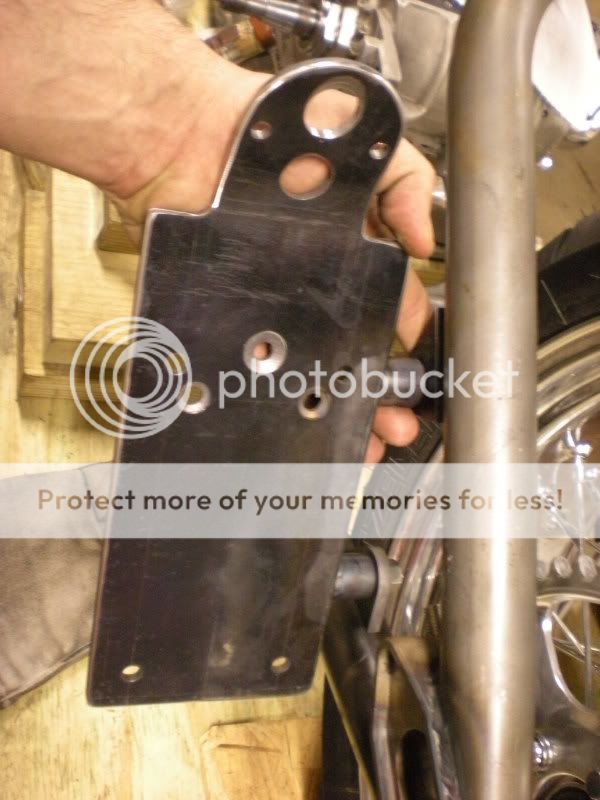
Here you can see I've drilled the necessary holes and roughly cutout the part. This baby is starting to take shape.
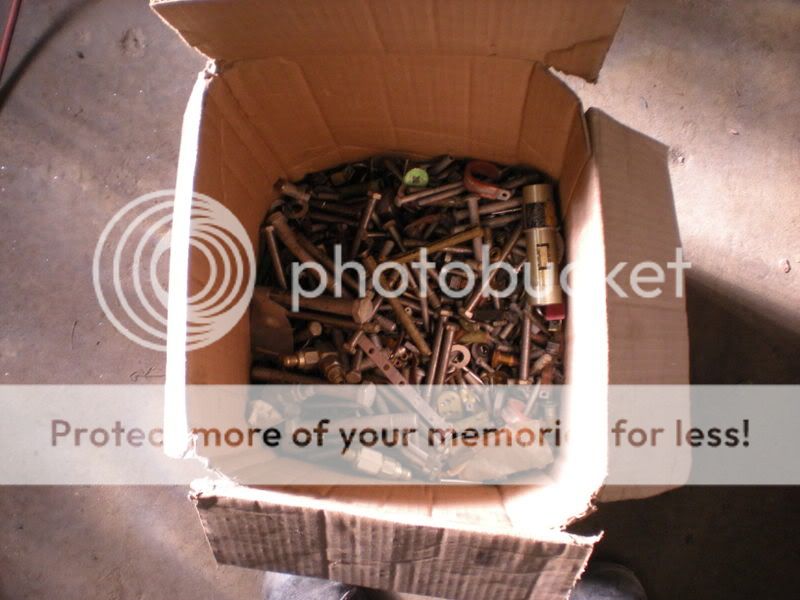
Now since I want to mount a remote oil filter underneath this I'm going to need to find some fasteners that pass through the bracket without protruding too much on the license plate surface. For this I'll need to dig through my box-o-fasteners in the corner of the shop. I don't know about you guys, but I'm a total fastener nerd, most of the pieces in the box are from an aircraft junkyard.
Now as much as I'd love to sit around all day looking at fasteners, I've got a bike to build and a case of beer in the fridge so I need to get moving and just grabbed three fasteners that looked like they might work. I was able to find matching nuts in my small parts bin (which is about the only part of my garage that has any kind of organization at all).
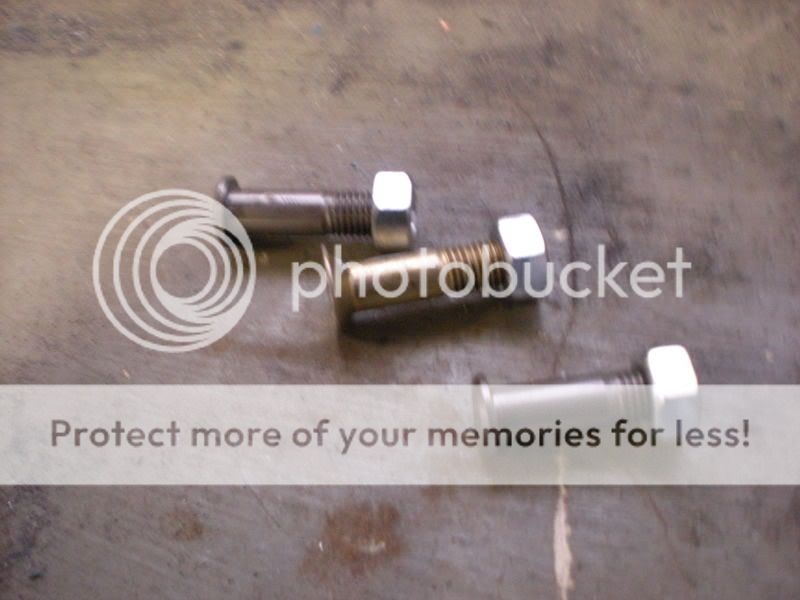
While these bolts are pretty low profile I want to make this part as clean as possible so I went back to the drill press to countersink the holes for my oil filter mount.
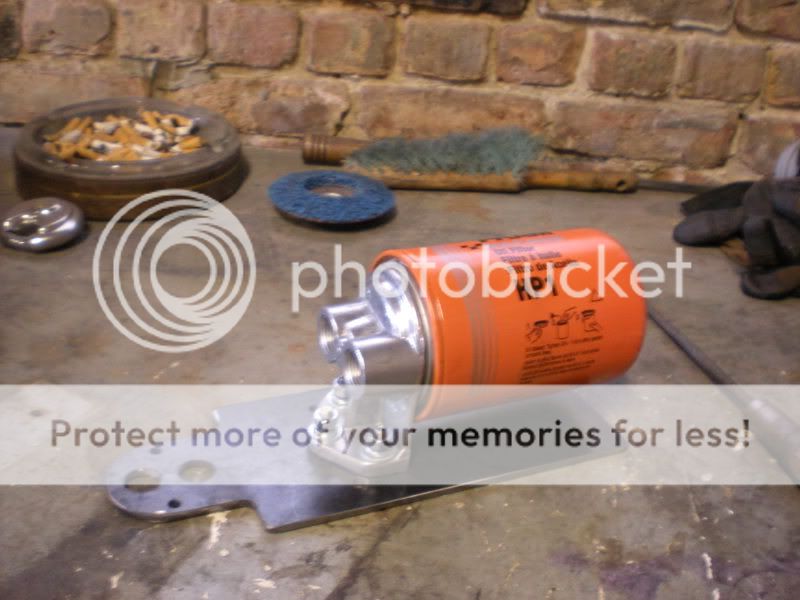
And here she is bolted to the part. Here I used a purchased oil filter mount, but I could've easily made one with the equipment I have. In the last issue of The Horse, Fabricator Kevin (who's just about the most stand-up guy you'll ever meet) showed how to do this.
Next I needed to put a bend in the taillight section of the bracket. This was a highly technical process that involves clamping the bracket in a vice and sitting my fat ass on it until it bent to the proper angle. I could have (read..."should have") used the oxy-acet torch to heat the part before bending but I ran out of acetylene a few days ago and I'm WAY too lazy to drag my tanks down to airgas for a refill.
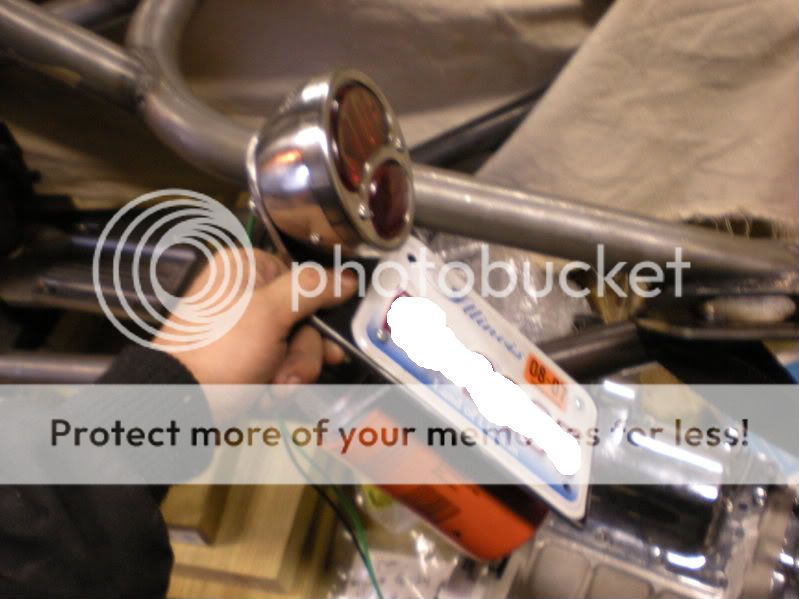
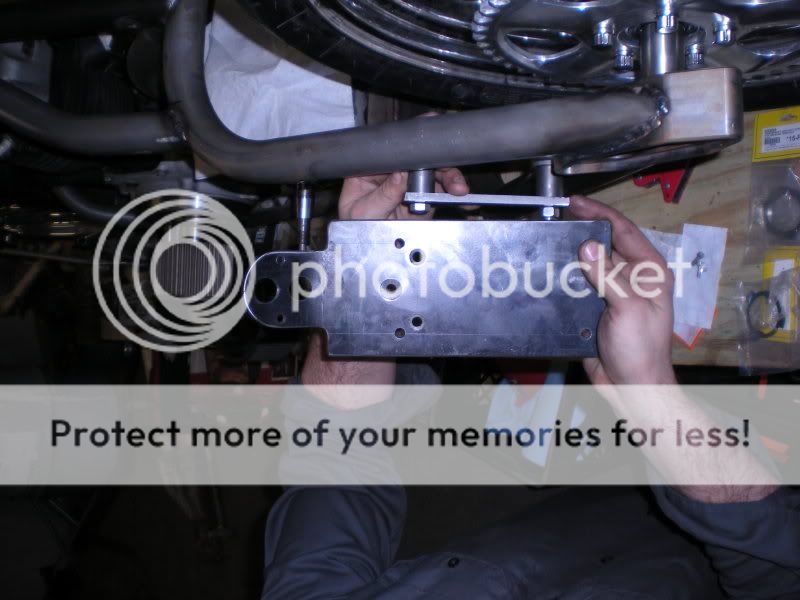
Here she is in the approximate location on the frame and mocked up with parts.

Now I realize I could've gone with some sort of axle based setup but I didn't like that idea. The only things I want on my axle are bearings, spacers, and my brake bracket. So I decided to fabricate an ultra-mega-duty bracket for the tag light out of plate steel and some roundbar (simple, simple, simple).

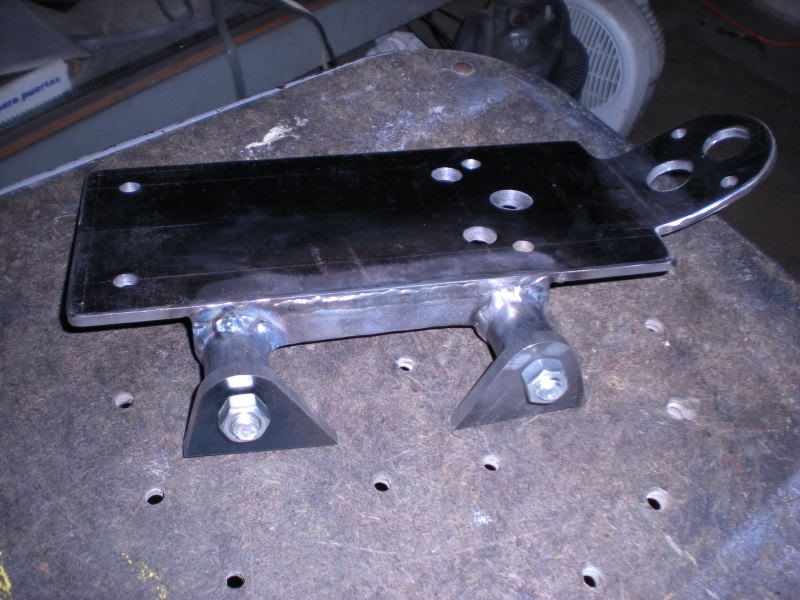
Here's the parts I made. It's basically three tabs with a couple of 1" spacers that are held together with 3/8 bolts. The idea is that the little tabs will be welded to the frame and the spacers welded to the third tab, which is then welded to the face of the tag mount (you'll see what I mean). My first thought was not to weld the spacers to the tab, but if those bolts somehow worked loose then I have to machine new spacers. Plus it adds complexity and additional parts, so I decided to weld them to the tabs.

Here I mocked up the parts by hand to get an idea of where the mounting bracket should be welded onto the face. I wanted to make sure that my tag light was just shy of vertical so that cellphone toting assholes in overpriced SUV's will get a facefull of "backoff" when creep up my ass on the highway.
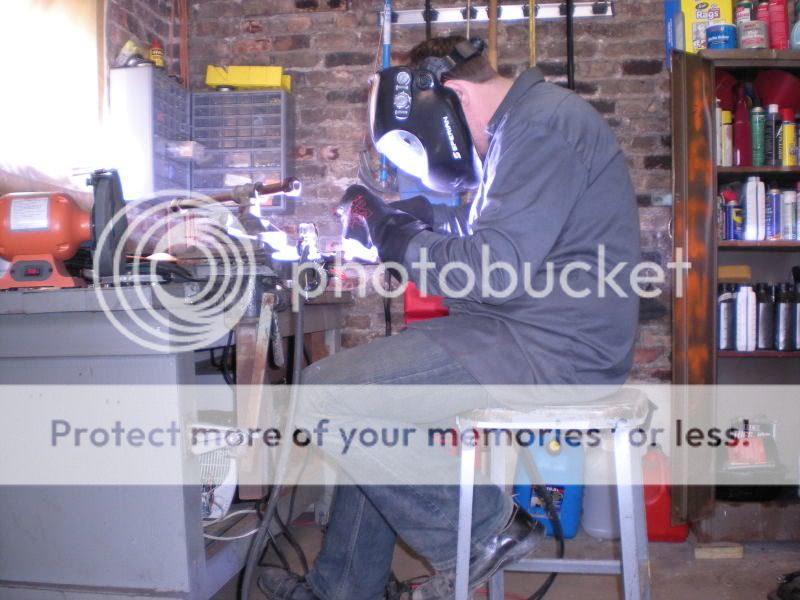
Clamped together and ready for welding.

Here's she is in her rough form. Yes I know those welds are boogery. I was out of practice and just wanted to get this done. Last night I went back over them with a few more amps and cleaned them up with a dremel flapper disc.
Here it is mocked up on the frame. All I need to do now is weld on the 2 tabs.
Some of you may recognize this from my posts on another board, but I think it's worth it to put this up here as well. I hope this inspires some of you who are interested in dipping your toe in the fabrication pool. My goal with this was to demonstrate that it doesn't take a multi-million dollar machine shop to produce custom parts. That said, I don't think this piece would be appropriate for a big-dog motorcycle but with a little creativity, a lot of spare time and some attention to detail you can produce just about anything with very simple tools. Now for my build this part required some welding, but you could just as easily make this bracket (or something way cooler) without having to weld a thing.
Anyway here goes...
First let me qualify this by saying I'm not a professional machinist and have no aspirations to be one. My fabrication skills are 100% self taught so I probably have some unorthodox ways of doing things but hey...they work for me. One of the most important aspect of fabrication is design layout. I learned how to do this through trial and error and watching people more skilled than I am make things in a fraction of the time it would've taken me. First, let's talk about some basic layout tools.
From bottom left to right->
The first item is (obviously) a ruler. If you don't know what a ruler is by now you shouldn't be building bikes...in fact, go buy yourself a helmet and some water wings just in case.
The next three items are scribers, they are used to mark or "scribe" lines on your workpiece. The first two scribers are your typical straight and 90 degree steel scribers, the third one is carbide-tipped and tends to hold a sharp edge longer than steel. One note about scribers, these need to be pretty sharp to maintain line integrity and ensure an accurate edge. While you can sharpen these on a bench grinder, you really should chuck these up in a lathe to ensure that the point is as close to center as possible (makes for more even lines). If neither of these are an option you can get them with replaceable tips (like my carbide scriber) and just order new tips as they dull with use.
The next three items are some basic center punches. These tools are used to make small indentations in the workpiece indicating the center of a circle (hence the term "center-punch"). Commonly these are used to mark drilling locations or to scribe a circle with the use of dividers (discussed below). Using a center punch properly is a skill in and of itself. Typically you will have an intersection of two scribed lines that you can feel with the punch when locating the proper position for the tool. Once you have the tool in position you TAP it with a small hammer (do not strike the tool as this can create an unnecessary large indentation and damage your work piece and/or punch). The third center punch is spring loaded and doesn't require any tapping to produce the indentation. Personally, I'm not a fan of the spring loaded punches because they require you to exert force against the tool to trigger the punching mechanism, which can cause the tool to shift out of position from time to time.
The next tool is a pair of dividers. These are similar to a compass in that they allow you to scribe circles or replicate precise distances to maintain part symmetry. There are several different kinds of dividers but I prefer the springloaded kind (shown here).
The next 3 tools are (in order) a t-bevel, protractor, and a square. The t-bevel is most commonly used for finding and transferring angles. The armature on the tool is adjustable and can be locked into place allowing you to transfer an angle from one part to another or from one area of a part to another. While the t-bevel is used to find angles, the protractor is used to measure them. This can come in handy from time to time and you may find yourself using these two tools more often than you think. The machinist's square on the far right is used to mark 90 degree angels. These tools typically have a thicker part (like the one shown) that is cut at 45 degrees allowing you to mark 45 degree angles as well.
In the upper left hand corner are a special type of center punch called "transfer", or "through" punches. You might notice that these have a significantly different shape than the center punches and that's for a very good reason. These are used to find/transfer the center of an *existing* hole. To use these tools you find the correct size punch that fit's into the hole you're trying to transfer and tap them, in the same way you would use a center punch. You'll notice that they have small, very shallow points at the end of a consistent cylinder, this is to allow you to find the center of a relatively shallow hole. Because these punches are used to find the centers of existing holes, they *must* be sharpened on a lathe unless you are confident that you can grind these precisely by hand (in which case you have some serious skills and need to be working for NASA or something).
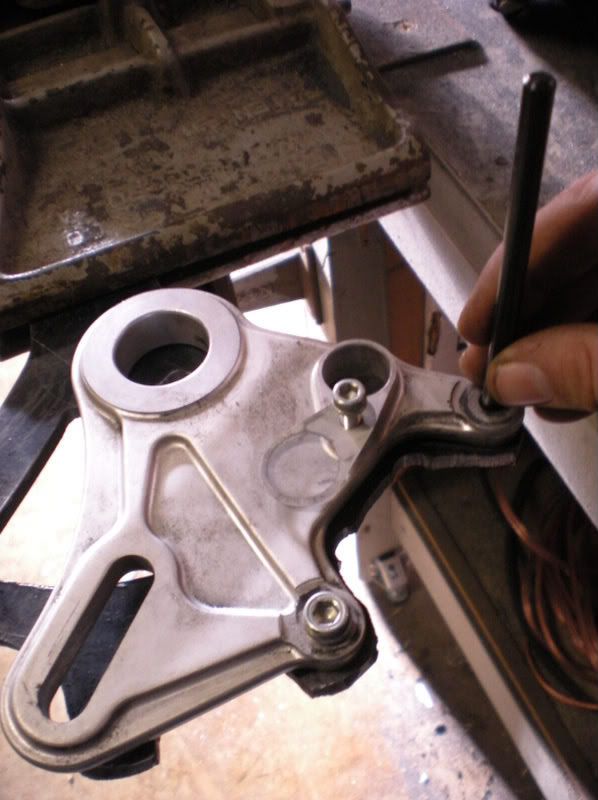
Here's an example of how I used these on to fabricate brake bracket for my current build project. One of the calipers I bought came with a bracket from a Ducati. I obviously couldn't use the supplied bracket on my bike since it was for a larger axle and a smaller rotor. In order to get the mounting holes correct, I used through punches to transfer the hole locations to my bracket. The procedure for this was as follows:
1. I located the distance from the center axle that I wanted the calipers to be at and scribed this radius with the dividers.
2. using a center punch I marked the location of the first hole and then used the dividers to mark the outside edge of the part from this hole.
3. Next I drilled the hole to the proper size, starting with a very small bit and working my way up to the desired hole size.
4. I bolted the original brake bracket to my unfinished part through the hole i just drilled and using a through punch that just fit through the hole on the brake bracket, I located my radius and marked the location of the second hole. In the picture below I have already marked and drilled the holes but you get the idea.
he last tool I'm going to go over is steel blue. This is basically an ink that is used to color your workpiece so that you can see your scribed lines better. Until recently I just used a black sharpie to accomplish the same task but you can get a much clearer line using the steel blue. I like to lay down a nice thick coat (about 1/64th of an inch) because this stuff has a tendency to rub off if you handle the part a lot (and this problem is only expedited by the use of cutting oil/or some other lubricant in your fabrication activities).
Now that we've got a basic understanding of how these tools work, let's put some of them to use to fabricate a license plate mount.
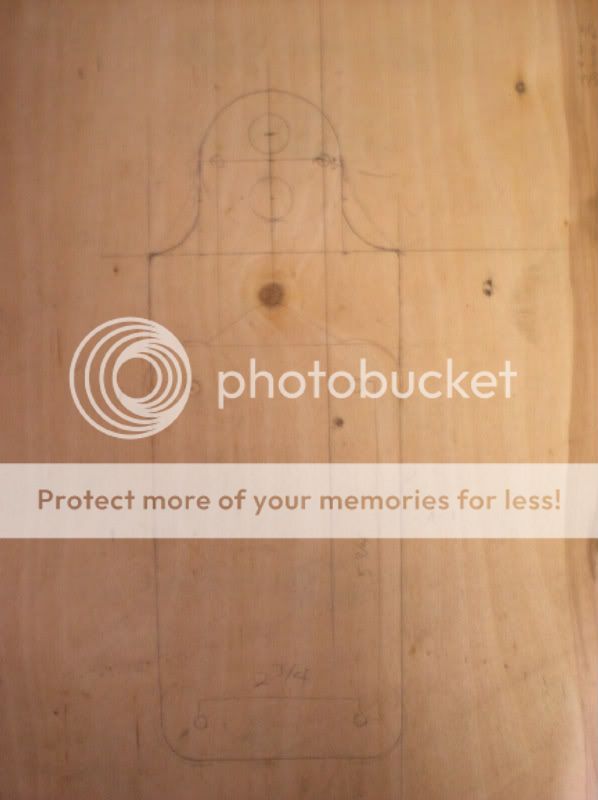
The first step is to come up with a design you like. Here you can see the design I came up with ; which was a highly technical process of stealing the license plate off of my other bike and tracing it out with a pencil onto a piece of scrap plywood.
I'm planning on mounting a remote oil filter underneath this bracket along with a stash tube for my registration (assuming I can even title this monstrosity). I've also laid out a section for the tail light.
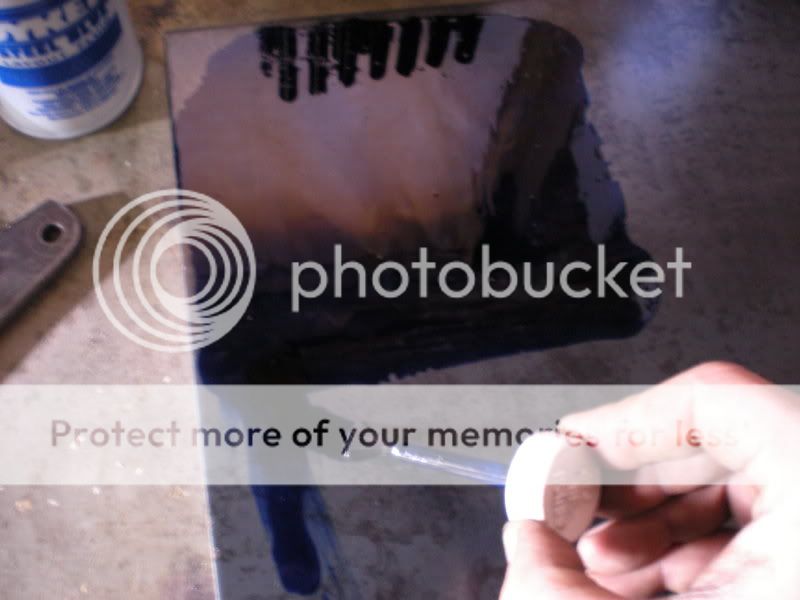
Next, I measured for the approximate overall size of the bracket and found a piece of scrap plate steel that I could work with. Once I had my plate, I brushed on a nice even coat of steel blue and waited for it to dry.
Now that the ink is dry I used the machinist's rule to mark the bottom edge of the part. It's common practice to make all measurements on a part relative to baseline or point (this helps promote accuracy and becomes more relevant when you start playing in the .005" world). Needless to say we have some pretty significant tolerance in the part since we're making a license plate bracket and not a camshaft. Nevertheless the edge of my scrap plate had a slight curf on it from when I last cut it and I wanted to have a nice straight line to work from. Then using the tools listed above I proceeded to transfer my design from plywood to metal.
Then I used a jigsaw with a bi-metal blade from home depot to cut off the excess steel. I then used a $10 angle grinder from harbor frieght with a cheap flapper disk to clean up the edges.
Now it's off to the drill press to make some holes.
Here you can see I've drilled the necessary holes and roughly cutout the part. This baby is starting to take shape.
Now since I want to mount a remote oil filter underneath this I'm going to need to find some fasteners that pass through the bracket without protruding too much on the license plate surface. For this I'll need to dig through my box-o-fasteners in the corner of the shop. I don't know about you guys, but I'm a total fastener nerd, most of the pieces in the box are from an aircraft junkyard.
Now as much as I'd love to sit around all day looking at fasteners, I've got a bike to build and a case of beer in the fridge so I need to get moving and just grabbed three fasteners that looked like they might work. I was able to find matching nuts in my small parts bin (which is about the only part of my garage that has any kind of organization at all).
While these bolts are pretty low profile I want to make this part as clean as possible so I went back to the drill press to countersink the holes for my oil filter mount.
And here she is bolted to the part. Here I used a purchased oil filter mount, but I could've easily made one with the equipment I have. In the last issue of The Horse, Fabricator Kevin (who's just about the most stand-up guy you'll ever meet) showed how to do this.
Next I needed to put a bend in the taillight section of the bracket. This was a highly technical process that involves clamping the bracket in a vice and sitting my fat ass on it until it bent to the proper angle. I could have (read..."should have") used the oxy-acet torch to heat the part before bending but I ran out of acetylene a few days ago and I'm WAY too lazy to drag my tanks down to airgas for a refill.
Here she is in the approximate location on the frame and mocked up with parts.
Now I realize I could've gone with some sort of axle based setup but I didn't like that idea. The only things I want on my axle are bearings, spacers, and my brake bracket. So I decided to fabricate an ultra-mega-duty bracket for the tag light out of plate steel and some roundbar (simple, simple, simple).
Here's the parts I made. It's basically three tabs with a couple of 1" spacers that are held together with 3/8 bolts. The idea is that the little tabs will be welded to the frame and the spacers welded to the third tab, which is then welded to the face of the tag mount (you'll see what I mean). My first thought was not to weld the spacers to the tab, but if those bolts somehow worked loose then I have to machine new spacers. Plus it adds complexity and additional parts, so I decided to weld them to the tabs.
Here I mocked up the parts by hand to get an idea of where the mounting bracket should be welded onto the face. I wanted to make sure that my tag light was just shy of vertical so that cellphone toting assholes in overpriced SUV's will get a facefull of "backoff" when creep up my ass on the highway.
Clamped together and ready for welding.
Here's she is in her rough form. Yes I know those welds are boogery. I was out of practice and just wanted to get this done. Last night I went back over them with a few more amps and cleaned them up with a dremel flapper disc.
Here it is mocked up on the frame. All I need to do now is weld on the 2 tabs.
")


