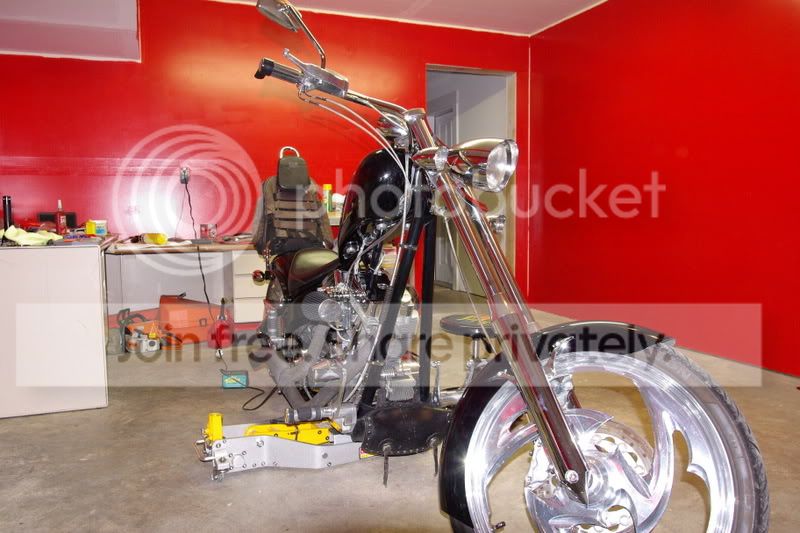
Headlight Bracket

Energy One

Raywood

The Pirate
Staff member
Calendar Participant
Troop Supporter
If you read my post on the "100 yrs of Motorcycling" that Knotso and I did last week you may know that my headlight bracket broke.
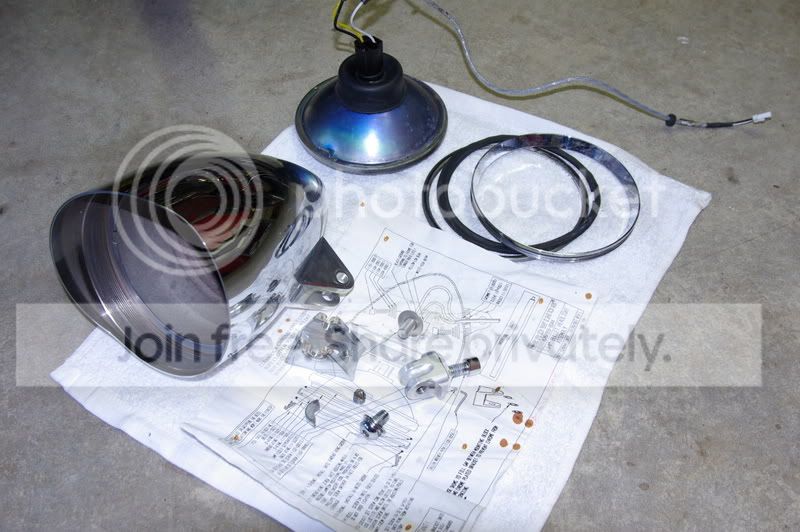
I ordered a replacement from Vicki and today took some pictures of the bracket and setup that some of you may want to check on your bikes.

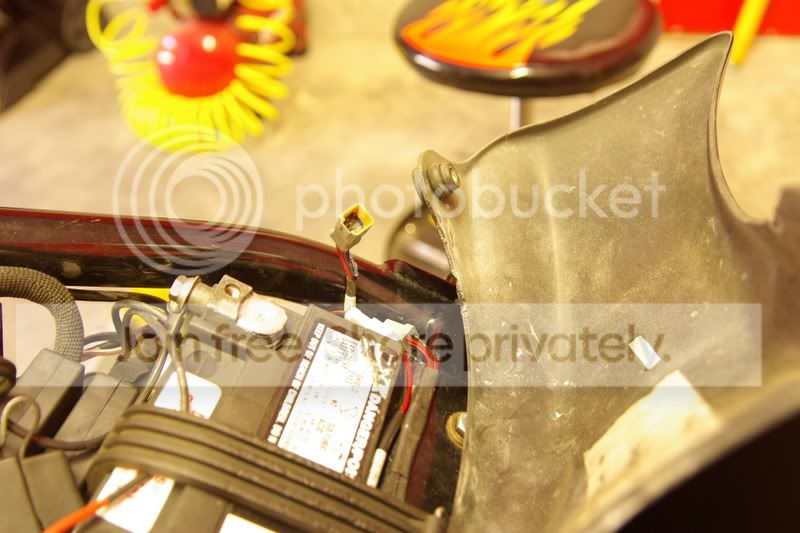
In this picture you see the new bracket on the headlight shell. The triple tree post shows two bolts on each side of it. One of these broke off on mine. You see the small portion of threads that I removed from the post and I believe this is what cause the bracket to break. The replacement bolts are stainless steel and should be stronger.

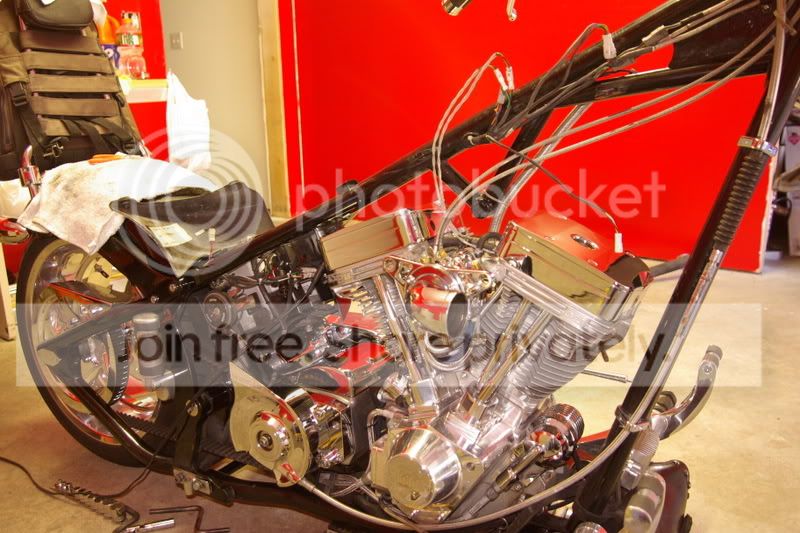
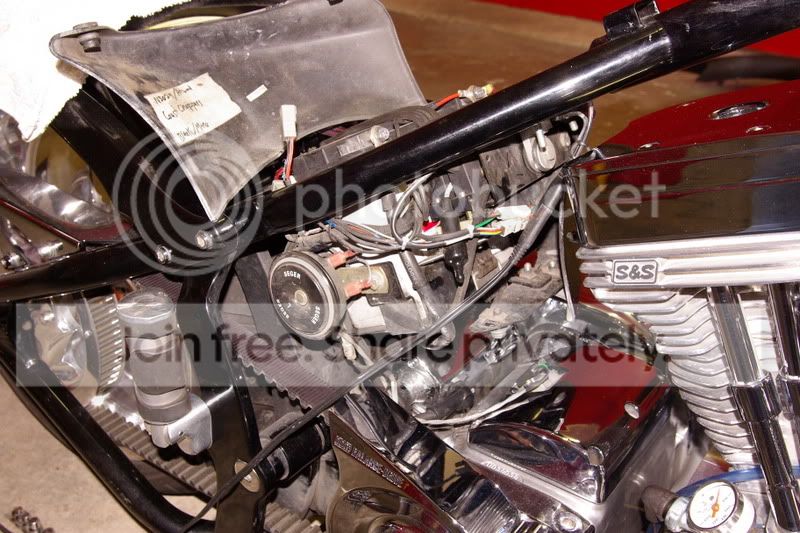
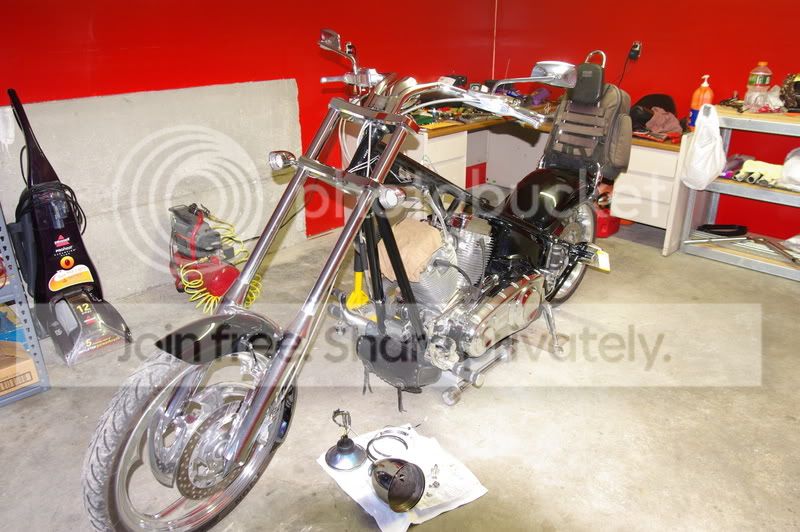
Here is a picture of the bikes upper end stripped down. I'm going through all the connectors re-filling them with die-electric grease and re-routing lines.
I haven't had an oil pressure light since my problems with it 2 years ago and for some reason when I removed my headlight after the bracket broke and riding in the rain the pressure light was coming on flickering. So, will get this fixed for good now. Plus get some much needed cleaning done. After my last three rallies coming home in the rain the bike is in dire need of some deep cleaning.
I also received a rebuild kit for the forward master cylinder so will get this done.

Later,
Ray
 

Raywood

The Pirate
Staff member
Calendar Participant
Troop Supporter
I'm surprised you went with another BDM headlight...
Do you mean the bracket? I thought I explained that the failure of one of the two bolts caused the bracket to break. The replacement bracket that Vicki sent me was a lot more solid (heavier) than the original one so with the stronger bolts I think it will last another 42,000 miles or even more.
As for the shell, it was in good shape except for the worn chrome on top from carrying my jacket on the trees. Nothing wrong with the headlight or bulb!

Later,
Ray
 

Fibersnake

Banjo Playing PsychoBilly
Raywood,

Did the bracket that Vicki send you, was it a stock BDM or by chance was it a true Headwinds? The one I replaced on mine was a Headwinds (logo on the side and all) and though I didn't catch it at first, come to think of it, it was heavier. May be the stock BDM is cast or pot verse billet. Or it could be that BDM use a lower grade Tradewinds system verse the upper Headwinds.

Either way my broken bracket looks just like your broken one in your pictures.
 

Gas Man

Cool isn't cheap
Calendar Participant
Raywood,

Did the bracket that Vicki send you, was it a stock BDM or by chance was it a true Headwinds? The one I replaced on mine was a Headwinds (logo on the side and all) and though I didn't catch it at first, come to think of it, it was heavier. May be the stock BDM is cast or pot verse billet. Or it could be that BDM use a lower grade Tradewinds system verse the upper Headwinds.

Either way my broken bracket looks just like your broken one in your pictures.
That's waht I was getting at. I thought maybe the BDM bucket was lackign quality.
 

Raywood

The Pirate
Staff member
Calendar Participant
Troop Supporter
Well it didn't have the Headwinds stamp on it. My 03 did! The bracket was better made. The old one was like pot metal.
But the failure was the bolt that broke then causing the bracket to break. Looked like the bracket held on for a while cause of wear marks.
I think it will be fine now with the new stainless bolts and better bracket plus I used larger washers for a better bit.

I don't think the bracket could have failed first then causing the bolt to break but you never know.

Later,
Ray
 
Last edited:

Raywood

The Pirate
Staff member
Calendar Participant
Troop Supporter
Not yet. Still replacing the intake seals and polishing up some of the motor fins that I can better access. I also found the lug broken that attached to the oil pressure gauge so have to replace it. Just got my exhaust pipes off also and putting in new gaskets.
Good ole general upkeep!
Beautiful weather this week but my 5 yr old is out of school this week.

Later,
Ray
 

Tim

Administrator
Staff member
Founder
Lifetime Supporting Member
Calendar Participant
Troop Supporter
Supporting Member
You really broke your chopper down.

What do you use to clean the fins on the motor?
 

Raywood

The Pirate
Staff member
Calendar Participant
Troop Supporter

Raywood

The Pirate
Staff member
Calendar Participant
Troop Supporter
Started putting everything back together and found some other problems so had to take off the side covers.
I remembered that Knotso said my taillights/blinkers were flashing off and on. So I traced the wire loom and found grounded wires where the loom crosses from the left side of the frame to the right side behind the battery. They are then routed down inside the right side cover and it was hear they had worn through. They were pretty chewed up so I put some RTV all along the wire where the insulation was worn off and when that dries I will cover it all with some shrink wrap material and zip tie it all up.
I have my clutch loose so I can get it adjusted. It hasn't been done in about 15,000 miles! And I may pull the cover and grease the clutch rod since I have it all apart.
With the side covers off I went a head and pulled all the connectors apart and re-greased them. So now the wiring looks like it ready to be put back together.
Looks like Chacha on his thread found his problem and it may have been a grounded wire so this maintenance is necessary on these bikes.
Here are a couple photo's.
May have it back together tonight but then again the NASCAR race is on today vice Sunday so may be tomorrow.
Also, my starter (the new one) started leaking and it was only a couple months old. The power cable is saturated so it won't last long. My dealer already called it in and BDM is giving me another one and my warranty expired almost a year ago so they have been taking real good care of me.
Hope all of you are having a great weekend.


kickstart

Well-Known Member
Ray,
I see you still have the TP boxes, have you had any valve problems or excessive noise with them?
 

Raywood

The Pirate
Staff member
Calendar Participant
Troop Supporter
Ray,
I see you still have the TP boxes, have you had any valve problems or excessive noise with them?
No, no different than my 03 Mastiff. Only issue I have with them is the cheap chrome on them. They are peeling all around them.
This motor has ran beautifully for 42,000 miles and I have no desires to get rid of it or trade it on any other model.

Later,
Ray
 

chacha

Chaff Your EHC!!
Calendar Participant
Raywood;

Great stuff. Thanks for all the pictures.

Sorry to hear another starter going bad, but glad BDM is hooking yaw up again!:up:
 

kickstart

Well-Known Member
Thanks Ray,
After talking with Vickie about prices on S&S the TP's are going to stay on mine unless I have problems or hit the Lottery.


No, no different than my 03 Mastiff. Only issue I have with them is the cheap chrome on them. They are peeling all around them.
This motor has ran beautifully for 42,000 miles and I have no desires to get rid of it or trade it on any other model.

Later,
Ray
 

Raywood

The Pirate
Staff member
Calendar Participant
Troop Supporter
Update on maintenance

Well guys, still have it apart in a hundred pieces although tonight it looking a lot better. I decided to go back to the carb and disassemble it and clean it. Good thing I did cause for the third time now I've found debris in the jets. When you hold them up to the light you can't see completely through. So, got it all cleaned up and back together.
Then I pulled the throttle apart again cause it was sticking. Turns out that last time I put it back together I pushed it to hard against the handlebar so the bar was grabbing/rubbing on the inside end of the grip. I try to keep all things tight so that they don't vibrate but in this case I had to leave a little slack in there and the throttle works and more importantly release easily now.
Tomorrow I drain, clean and adjust the primary chain. Then I'm going to take up Gas Mans suggestion and shrink wrap all the connectors that I just pulled and re-greased. Figure with as much rain as I've been riding in I may as well.
Got the headlight back on and adjusted too. Got to get the exhaust back on and hook up the coil cover and it should be ready for start up.
At this rate I will have went through almost every system on the bike! :2thumbs:
A couple pics just to keep up with GS! :eek:

Later,
Ray


Alicat

Hanging out
Whoa, love the idea of the dime! Hadn't thought about that and been carrying a small screwdriver! Daaahhh!
Al
 

Gas Man

Cool isn't cheap
Calendar Participant
Well guys, still have it apart in a hundred pieces although tonight it looking a lot better. I decided to go back to the carb and disassemble it and clean it. Good thing I did cause for the third time now I've found debris in the jets. When you hold them up to the light you can't see completely through. So, got it all cleaned up and back together.
Then I pulled the throttle apart again cause it was sticking. Turns out that last time I put it back together I pushed it to hard against the handlebar so the bar was grabbing/rubbing on the inside end of the grip. I try to keep all things tight so that they don't vibrate but in this case I had to leave a little slack in there and the throttle works and more importantly release easily now.
Tomorrow I drain, clean and adjust the primary chain. Then I'm going to take up Gas Mans suggestion and shrink wrap all the connectors that I just pulled and re-greased. Figure with as much rain as I've been riding in I may as well.
Got the headlight back on and adjusted too. Got to get the exhaust back on and hook up the coil cover and it should be ready for start up.
At this rate I will have went through almost every system on the bike! :2thumbs:
A couple pics just to keep up with GS! :eek:
I had the same problem when I installed the roulette grips. There are 2 channels in the controls. The throttle hookup on the grip needs to go into the housing closest to the end of the bar. It will fit in the other one but will do just like you and I both had... give you throttle release problems. Let me guess, it also would snap from full release to throttle engage...


Whoa, love the idea of the dime! Hadn't thought about that and been carrying a small screwdriver! Daaahhh!
Al
I just use my fingers.... with the hex head I, myself, find it easy.
 

Raywood

The Pirate
Staff member
Calendar Participant
Troop Supporter
Started it up today!

Finally got it running again today. Was a long down time (2 weeks) after the last ride (100 yrs of Motorcycling, 941 miles in 24 hrs) http://www.bigdogbiker.com/photo/showphoto.php/photo/854/cat/520/limit/recent and the 6 hrs of rain I had to endure coming home.
Any way, as you have read if you are following my thread I have almost completely gone through the bike. Before starting it today I have completed the following:

Complete wiring cleaning, greasing, shrink tubing and sealing w/RTV.
Gas tank flush
Carb torn apart and cleaned, lubed and re-assembled (full of debris again)
Replaced intake seals
Replaced exhaust gaskets
Throttle cables lubed and adjusted
Throttle control adjusted and re-assembled (was binding)
Clutch pulled, clean, lubed, adjusted and re-assembled
Headlight bracket replaced (got it back together and found out bulb was blown so had to do it over!!! :bang:
Primary drained, chain adjusted and new oil
Grounded tail light wires fixed (right side of battery)
Oil pressure switch lug fixed (first time in 2 yrs I have a pressure light)
Tappet screen pulled cleaned and re-installed
Fork caps pulled and cleaned
Drive belt adjusted
Neutral light short fixed
Good cleaning (it really needed it)

Besides all the previous pictures I've posted I am most proud of my wiring job. While I've had this bike apart a hundred times this will the first time I really spent a lot of time on the wiring. Mostly due to grounded tail light wires. So, figured I would ensure this time that the wiring loomed was really sealed and did what "The Post Whore" has done and sealed all the wires with shrink wrap and RTV. As Fat Cat put it on the other site, it's as tight as any submarine i've ridden (and thats been a few).
After 42,000 miles the wiring was in pretty bad shape with worn insulation and grounded wires everywhere so I pretty much re-wired it!
Got it all together then turned the key on and the hi-beam was blinking! :angry: Turns out that when the bracket busted it blew the low beam so pulled out the spare bulb and after taking so much time assembling the head light I did it over again!
After getting the tank back on and putting some fuel in it it was time to fire it up. Went up to make a fresh drink!!!!
After turning on the petcock and letting the carb fill up I hit the start button.....

It fired right up. :cheers: Couldn't have asked for any better. After dis-assembling a lot of components and putting everything back together especially all the wiring it just fired up on the first stroke. Didn't even have to prime the carb!
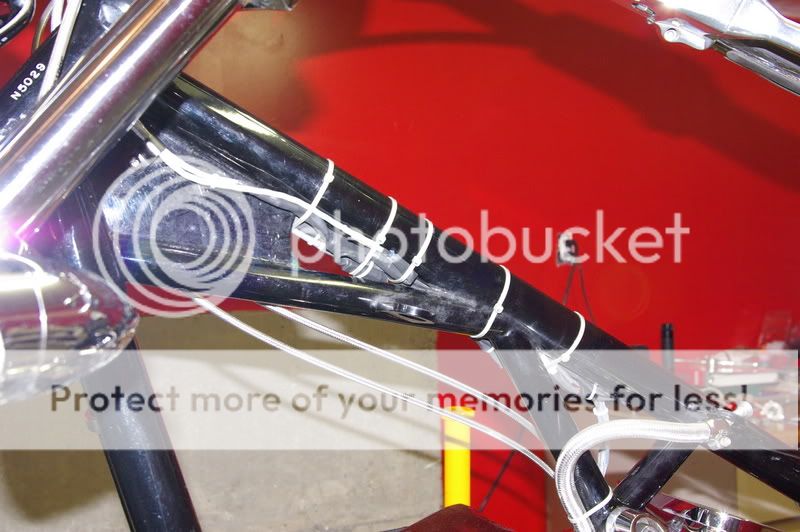
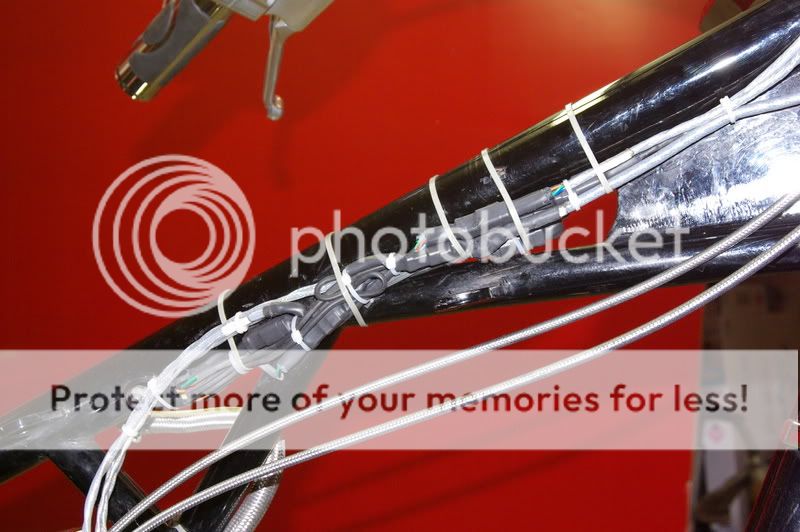
Anyway, here are a couple of last pics of the wiring job I did on it. May not be up to Gas Mans standards :eek: but it's ready for another 40,000 miles now and whatever rain mother nature wants to throw at me.

Enjoy your weekend,
Ray


Last edited:
Top