Parts needed:
1. A battery.
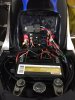
2. Any volt reg that obviously fits the stator's plug end, the heavy wire out of the v/r to the battery. Charging system done. First fuse used.
3. A wire junction block or buy the longer blocks and saw them down for assorted placements. Where you use eyelets for the blocks. Use the soldering gun to eliminate all those crunch caps? Then the shrink tubing over the wire and eyelet.
4. A tube of 'amazing goop glue' so you set a block at the neck of the frame, you remove the wires off the block and now take the whole front end off with two wires used for the headlight. Then, a longer block if you go with winkers.
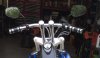
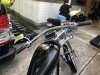
5. A set of sacrificial feeler gauges and the goop sets the bent feeler off the handlebar. You bent the blade in a W kind of bend so you touch the blades to the bars and there are your turn signal buttons. Less wring eliminates the turn signal/horn/high beam/kill/etc switches. Want a kill at the bars? Blade up to short the coil to ground. This is old style dirt track kill setup, minus the black tape that will melt the glue, where the goop dries, takes the heat, oil, gas kind of amazing shit in a tube.
6. Any self contained spark unit like a crane, or any year harley type cup in the cone with pickup and black box. There are 4 wires used if I recall? Ground/hot/coil/VOES? I'd have to follow the black box wires but it's sounds like the ignition loop is taken care of.
7. Another block placed on on the frame for the taillight so this too is a quick unscrew at the rear fender.
8. Where I think I'm on my 6th homemade wire harness for the ground up choppers my nephew flipped. So it's service/maintenance first, looks second. Where you can glue and hide the wires with dabs of goop glue holding the wire lengths and no zip-ties used is the cleaner look.
9. Search any chopper wire harness diagram and build each loop as per wire(s) to jobber and out to said ground and power source. I have a ground at the headlight, low as the runner, and use male/female wire ends out of the bucket so all I have to do is swap to the high beam if the low blows out. Use a toggle switch for power on and this lights everything, or a key switch with ign only, and one more turn, it runs the running light and headlight. Use fuses when the diagram calls for said loops.
These are the blocks, and use whatever is needed to the jobber's side. Where you could solder the wires to the jobber, and remove the wire ends at the block.
The long block can be cut down and you hot the one bank or individually hot that side with said eyelets.
These crunch connectors are to be avoided due to 2 connect points and the bulky-in the way-clutter that begins to develop as the loops are being built.