
Stuck Fork Seals - help plz!
- Thread starter JWScarab
- Start date

Take a hacksaw blade by itself and cut the sleeve down the middle. The thin to no wall of the [cut] sleeve will collapse some so the sleeve is easy to slip up and out. Take DustOFF for computer cleaning, spray the new sleeve so it freezes and shrinks, torch the leg at the sleeve's entry point and on down to it's body is the torch is just heating that area. Send it home with the pvc or a rawhide mallet small enough to bang down even and straight so you can tap the sides that are high and it eventually centers and slides down enough.
Leave the lower one alone and send the new one deep down inside so the second new sleeve is at the top. The leg is more stable; the fork seal won't open with a gap with that worn sleeve, meaning, the new seal will keep the lip from elongating as probably what is causing a new seal to leak are worn sleeves and not some pitted leg that has none, meaning.
Leave the lower one alone and send the new one deep down inside so the second new sleeve is at the top. The leg is more stable; the fork seal won't open with a gap with that worn sleeve, meaning, the new seal will keep the lip from elongating as probably what is causing a new seal to leak are worn sleeves and not some pitted leg that has none, meaning.

JWScarab
Active Member
Hi Sven. I appreciate your help - I really do!! You are always helping me and others. Your fix sounds like it will work to get the bushings out, but I have to admit - I just dont know that I have it in me to keep going with this particular task. I boxed the parts up and am shipping to Curtis. Curtis is going to fix and reassemble with new tubes and seals. Then ship back to me and I will bolt the legs on. I hate to give up, but I have to on this one! Thanks very much for your help tho!Take a hacksaw blade by itself and cut the sleeve down the middle. The thin to no wall of the [cut] sleeve will collapse some so the sleeve is easy to slip up and out. Take DustOFF for computer cleaning, spray the new sleeve so it freezes and shrinks, torch the leg at the sleeve's entry point and on down to it's body is the torch is just heating that area. Send it home with the pvc or a rawhide mallet small enough to bang down even and straight so you can tap the sides that are high and it eventually centers and slides down enough.
Leave the lower one alone and send the new one deep down inside so the second new sleeve is at the top. The leg is more stable; the fork seal won't open with a gap with that worn sleeve, meaning, the new seal will keep the lip from elongating as probably what is causing a new seal to leak are worn sleeves and not some pitted leg that has none, meaning.

KaptinAmerika
Guru
LOL...shit man I just told you a few posts back about the time I did the same thing you did and all it did was pull the tube out and leave the bushing. Live and learn though right.
I'll be watching for your box. I've gotten them out before so I don't see yours being an issue.
I'll be watching for your box. I've gotten them out before so I don't see yours being an issue.
JWScarab
Active Member
I know Curtis - its a shame. I tried....lol. I guess worse case I'm buying new tube and lowers!! Oh well. One lower has a buggered up hole edge also where the 6mm screw goes thru (stuck copper washer, but I got it out). Take a look at em. If its more labor cost or even close vs buying new lowers - obviously we can just do new lowers and tubes and you could just assemble the new stuff and ship back.
I really really appreciate you taking on my mess......lol.
I really really appreciate you taking on my mess......lol.
JWScarab
Active Member
Well guys - Curtis did it again!! Helped me out BIG TIME. My lowers were pretty bad after my attempt to get the seals out. I packed up the parts and sent to Curtis. He called and said he had a set of new open box lowers that he sold me at a great price!! Added new tubes, assembled with all new parts and shipped back to me!
I installed the leg assemblies today and took her out for a spin - They look SO COOL !!!
THANK YOU Curtis!!!!
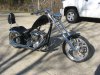
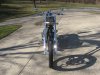
I installed the leg assemblies today and took her out for a spin - They look SO COOL !!!
THANK YOU Curtis!!!!

KaptinAmerika
Guru
Thanks to all of you here, and my other customers here and around the globe, I am getting pretty good with the BDs.
JWScarab
Active Member
x2 He sure did! The lowers look sweet - I love em!! They match the bike style perfectly!!Nice job Curtis.

Twisted
Well-Known Member
x2 He sure did! The lowers look sweet - I love em!! They match the bike style perfectly!!
Hey man, I owe you a beer! I just had the same damn thing happen to me. I ordered new tubes and rebuilt my front end, everything came apart without any problems and reassembly was easy too until I snapped a pinch bolt but I got that fixed. It was way easier to do the job then I thought until I got the bike down on the ground and realized it sat a lot lower, had a hard time even getting the jack out from under it. Anyway come to find out they set me the wrong size tubes in a 10"over box so I had to take everything back apart last night and that's when the shit hit the fan. This time the same thing happened that you delt with, every time I slammed them apart, it got stuck. I finally got the left side apart the normal way and notices the lower bushing was getting pushed though the upper bushing. The right side wouldn't go, tried everything, then I removed the seal and washer and saw the upper bushing stuck in the lower leg. I remembered this post and looked it up to see what you did for ideas and say the press tool you made. Ran to Lowes, got some pvc pipe and a bolt and did the same but used an impact gun and "pop", it finally came off. My bushing is still in the lower but its not seated all the way like yours was, it came up a little so there is a gap under it before it hits the shoulder so I think I"ll be able to get it out without damaging the lower. In the end I measured and the tubes are 4"s shorter, how I didn't notice that is beyond me but I was just in the zone of getting it done.
So just wanted to say a big THANKS for the idea, was trying for a couple hours and got nowhere till I tried your method.

JWScarab
Active Member
Hey Twisted! I'm glad you were able to get them apart! That method works great for getting them apart without any damage to the lowers! The tubes press right out! Damn shame the lower bushing sticks like that.Hey man, I owe you a beer!
I'll take a Michelob Light. Not Mich Ultra - too watery. Has to be a Michelob Light. Thanks!!!

Twisted
Well-Known Member
You got it!Hey Twisted! I'm glad you were able to get them apart! That method works great for getting them apart without any damage to the lowers! The tubes press right out! Damn shame the lower bushing sticks like that.
I'll take a Michelob Light. Not Mich Ultra - too watery. Has to be a Michelob Light. Thanks!!!
Sent from my SM-G900V using Tapatalk

Twisted
Well-Known Member
If everything was easy, life would be boring. Nice to challenge yourself every once in a while even if it's not planned.Measure once, cut 3 times, wait that ain't rightmeasure 3X, cut once. yeah thats it
We've all been there, mine happened to involve a hammer n chisel

Sent from my SM-G900V using Tapatalk

BWG56
Guru
Hey, if you don't make mistakes, then your not doing anythingIf everything was easy, life would be boring. Nice to challenge yourself every once in a while even if it's not planned.
Sent from my SM-G900V using Tapatalk


chubs
Guru
I must be one busy MoFo!Hey, if you don't make mistakes, then your not doing anything
 If it aint broke, I didn't touch it!