

gearsmithy
Active Member
A while ago I promised a howto on making your own set of bars. well here it is, i know some of you will recognize a lot of this content, in which case congratulations, reward yourself with a beer for being ahead of the pack.
Now a couple of things I want to point out before I chronicle the fabrication of my bars. There was some trial and error here and I have cut out the screw-ups that I've posted elsewhere. And yes, I used "specialty tools" such as a lathe, tubing notcher, etc. But the same effect could've been accomplished with a drill press, an angle grinder, and a belt sander (it's just a matter of how much time you want to put into the project). It should be noted that this project employed sand bending, a very dangerous and old school technique for bending tubing. This technique will require an oxy acetylene torch to perform. Propane just won’t cut it so don’t attempt this without an O/A outfit (or use a tubing bender, whatever ya got).
In this case welding was necessary, but if you have aftermarket risers all you really need to do is bend a length of tubing around a well-designed jig, slap em in your risers and go... no welding, no turning, no shit.
Now if you follow my howto to the letter you will end up with some pretty funky bars that might look a little silly on a big dog. Understandably, these bars are not for my big dog but every step in the process could be used to replicate the stock big-dog handlebars. So while the piece in question is not a big dog part, the process for producing the finished piece is exactly the same.
Ok, let's get started.
-----------------------Making Risers------------------------------------
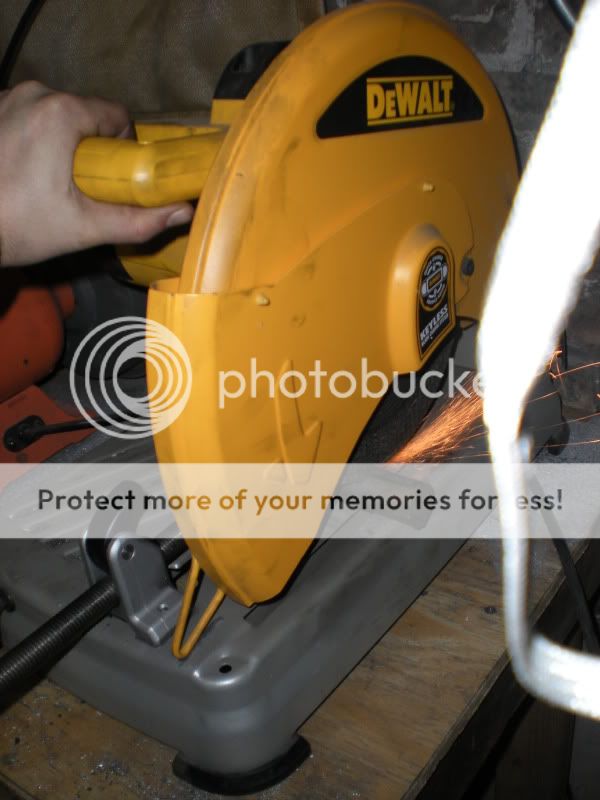
My plan here is fabricate these bars without using a tubing bender and in the spirit of the old speedster handlebars of yore. This project, just like most, begins at the chop saw where I cut lengths of 1-1/4” roundbar, 1-1/4” DOM tubing, 1” DOM tubing, and 1-1/2” 6061 roundbar (I’ll explan all this later).
After I had my materials cut I began to machine a set of weld-on risers. Since speedster bars were integrated into the front end as a single unit, I figured I might as well keep that idea and weld the bars directly to the risers.
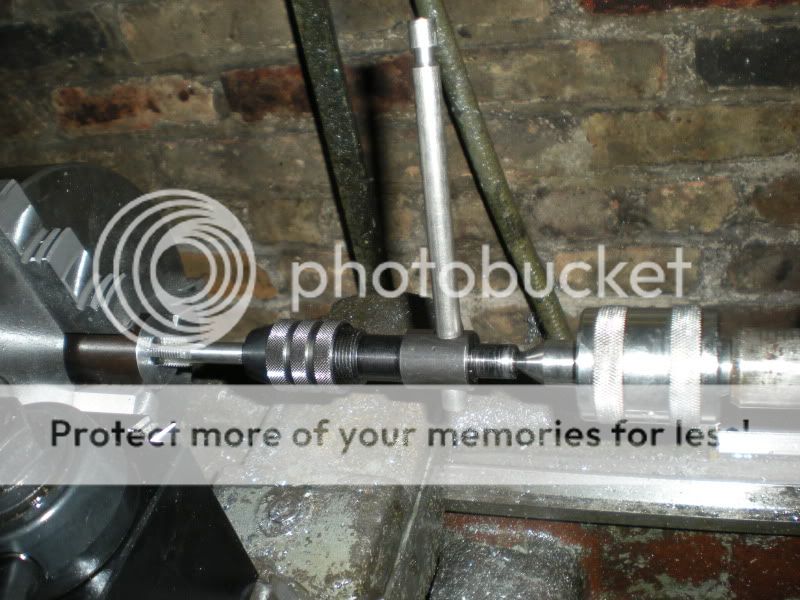
The best part about tapping threads on a lathe is that you don’t have to worry about the tap going in crooked and there is less risk of the tap breaking off. The downside is that you have to keep chasing the tap handle with the center. Through trial and error I discovered the perfect amount of pressure to put on the tap handle is just enough to turn a live center in the tailstock. It’s was a bit tricky at first but after few turns I got into the rhythm of it… turn, break chips, chase, repeat.
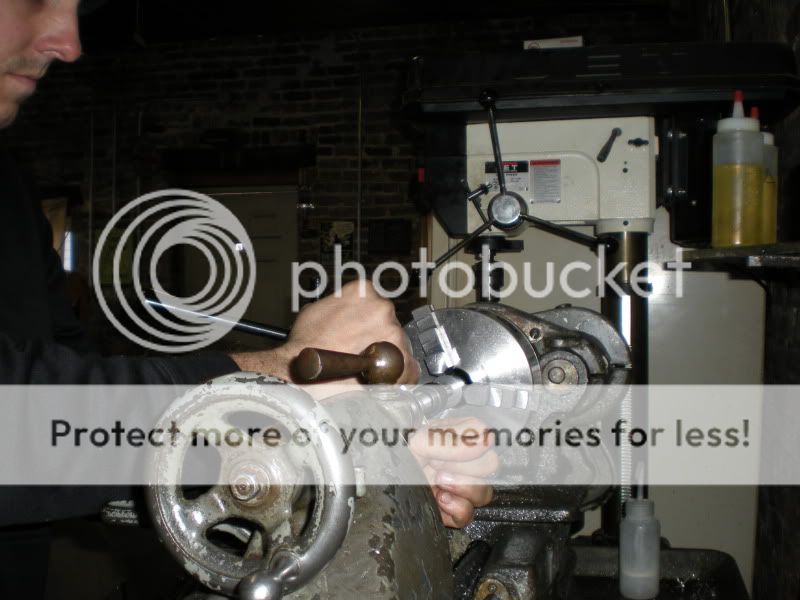
Since speedsters have a very distinct sleeve around the bars I knew I had to cope some 1-1/4” tubing. I chose an approximate angle of 15 degrees for the bar sleeves, and 0 degrees for sleeves to connect the risers.

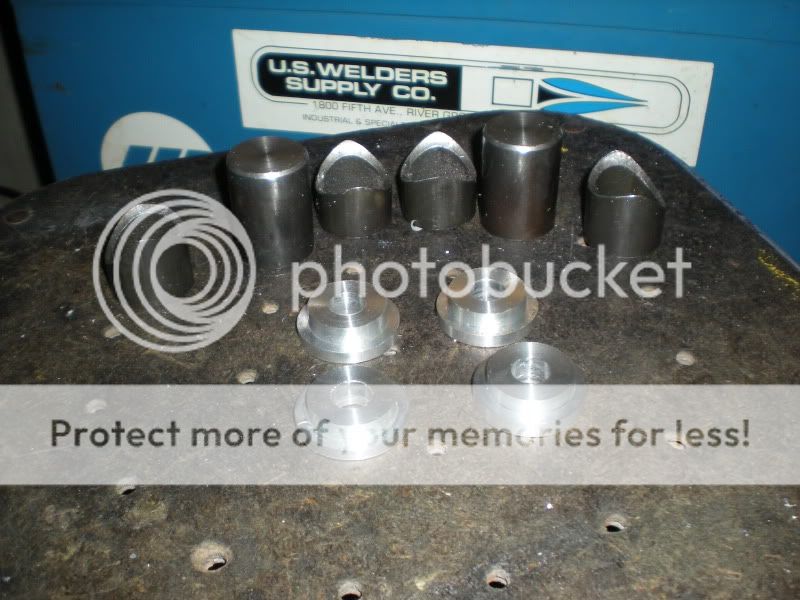
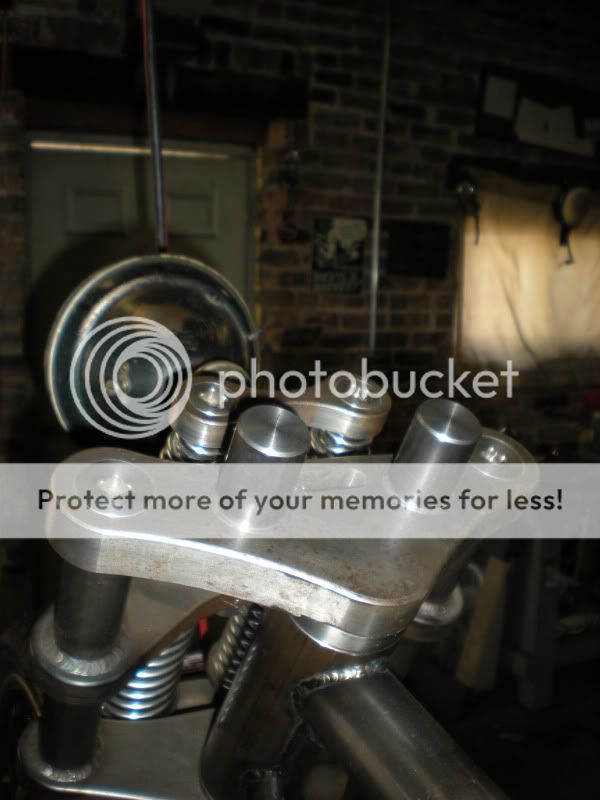
I also machined some riser bushings out of 6061, since I didn’t have any polyurethane on hand. These are just temporary and will be used for mockup only. I probably could use these to hard mount the bars but I’m working with a shovelhead here, and I do enjoy being able to feel my hands.
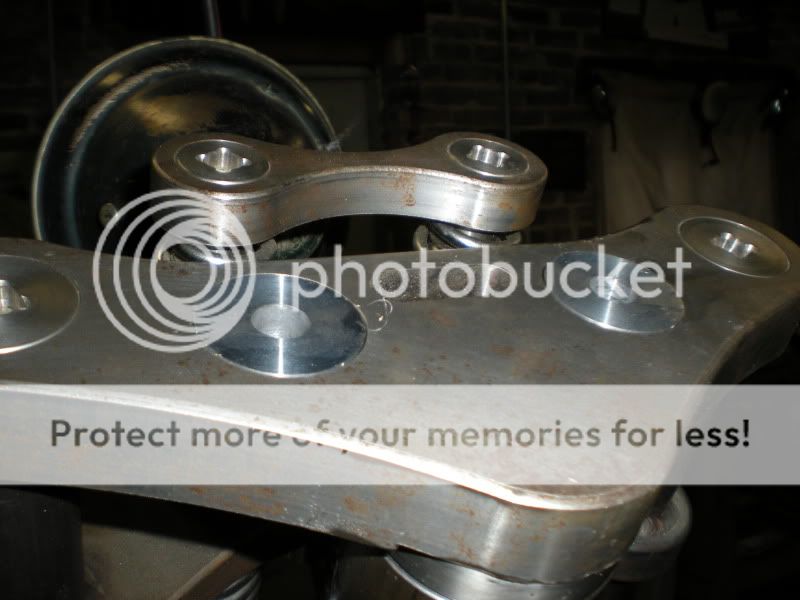
Risers installed with 1/2-20 bolts.
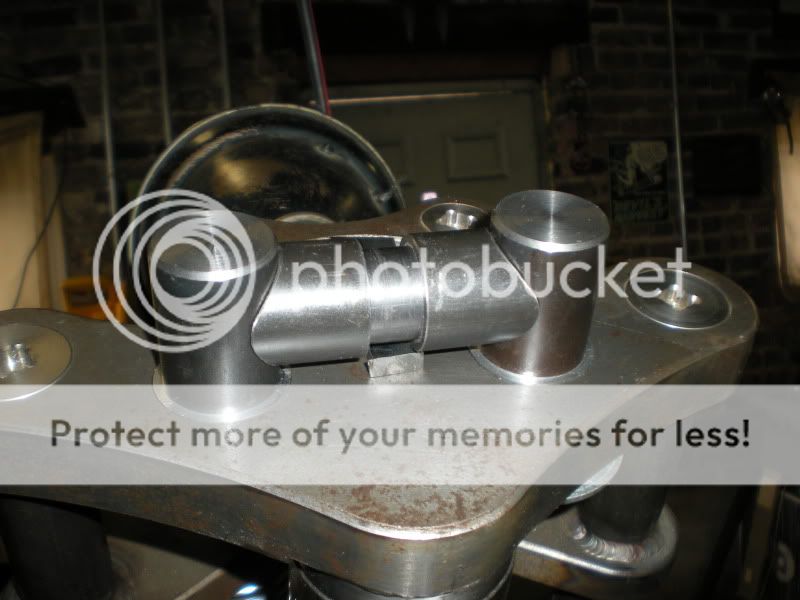
Now there is no way in bloody hell that I’m going to be able to accurately fishmouth both ends of a single piece of tubing in my shitty-ass tubing notcher. So I decided to sleeve a small piece of 1” tubing here as well.
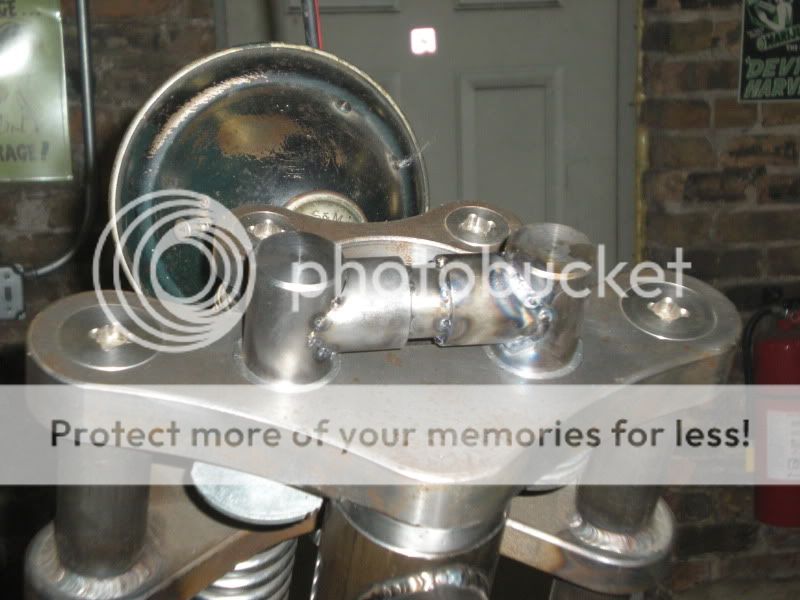
With everything tightened down, I tacked each part into place about 300,000 times.
Now a couple of things I want to point out before I chronicle the fabrication of my bars. There was some trial and error here and I have cut out the screw-ups that I've posted elsewhere. And yes, I used "specialty tools" such as a lathe, tubing notcher, etc. But the same effect could've been accomplished with a drill press, an angle grinder, and a belt sander (it's just a matter of how much time you want to put into the project). It should be noted that this project employed sand bending, a very dangerous and old school technique for bending tubing. This technique will require an oxy acetylene torch to perform. Propane just won’t cut it so don’t attempt this without an O/A outfit (or use a tubing bender, whatever ya got).
In this case welding was necessary, but if you have aftermarket risers all you really need to do is bend a length of tubing around a well-designed jig, slap em in your risers and go... no welding, no turning, no shit.
Now if you follow my howto to the letter you will end up with some pretty funky bars that might look a little silly on a big dog. Understandably, these bars are not for my big dog but every step in the process could be used to replicate the stock big-dog handlebars. So while the piece in question is not a big dog part, the process for producing the finished piece is exactly the same.
Ok, let's get started.
-----------------------Making Risers------------------------------------
My plan here is fabricate these bars without using a tubing bender and in the spirit of the old speedster handlebars of yore. This project, just like most, begins at the chop saw where I cut lengths of 1-1/4” roundbar, 1-1/4” DOM tubing, 1” DOM tubing, and 1-1/2” 6061 roundbar (I’ll explan all this later).
After I had my materials cut I began to machine a set of weld-on risers. Since speedster bars were integrated into the front end as a single unit, I figured I might as well keep that idea and weld the bars directly to the risers.
The best part about tapping threads on a lathe is that you don’t have to worry about the tap going in crooked and there is less risk of the tap breaking off. The downside is that you have to keep chasing the tap handle with the center. Through trial and error I discovered the perfect amount of pressure to put on the tap handle is just enough to turn a live center in the tailstock. It’s was a bit tricky at first but after few turns I got into the rhythm of it… turn, break chips, chase, repeat.
Since speedsters have a very distinct sleeve around the bars I knew I had to cope some 1-1/4” tubing. I chose an approximate angle of 15 degrees for the bar sleeves, and 0 degrees for sleeves to connect the risers.
I also machined some riser bushings out of 6061, since I didn’t have any polyurethane on hand. These are just temporary and will be used for mockup only. I probably could use these to hard mount the bars but I’m working with a shovelhead here, and I do enjoy being able to feel my hands.
Risers installed with 1/2-20 bolts.
Now there is no way in bloody hell that I’m going to be able to accurately fishmouth both ends of a single piece of tubing in my shitty-ass tubing notcher. So I decided to sleeve a small piece of 1” tubing here as well.
With everything tightened down, I tacked each part into place about 300,000 times.


 Nice :2thumbs: