Help with WP key installation

JeffM

Active Member
I have a drama, i am installing the Wire Plus key into the coil cover.

I have got it missing the coil now so that is ok.

BUT the Key side locking nut is bloody huge.
There is no way it is going to fit without cutting the recess larger.
Is this what has to happen?
I have already ground out the back side to suit the first step to allow the thread to protude a bit more.

If you did cut out to take the lock nut, how did your chrome end up, how did you mount it if you did not use the lock nut?
What other options have i got?

Some pic's would be good please.

HELP:confused::confused::confused:
 

Splitlog

Well-Known Member
I ground a flat side in the threads of the switch. It slide right in. The keeper nut goes in the trash. I drilled and tapped for two set screws to hold the ignition switch in place. Same as the pics in the How To section?
 

JeffM

Active Member
I think Ray has the right idea, that is the direction i think i am heading, with a shit load of sikaflex to hold it in place.

Why wouldn't WP do a switch that fits straight in, surely there has got to be something more attractive than gouging the shit out of a perfectly good coil cover.

Oh well thanks all
 

Olde Man

Active Member
Do not hard mount the switch. The vibration from the coil cover causes the contacts to bounce. Put a large golb of RTV under the switch to hold in place or use the original key switch and a relay to interface it.
 

mastiffdave

Well-Known Member
Welcome to the POS wire plus switch. Set screws or rtv is the most common way of mounting, ::confused:The best way for looks and durability is to machine the cover to use the lock nut as lots a members here has done.

Does the instruction you are using show the switch install with the set screws or is it missing like mine was.? If so we can send a diagram for you.
 

Moespeeds

Well-Known Member
I enlarge the hole with a unibit, and cut the recess with a small cutoff wheel. There is plenty of meat there to work with, use the cutoff wheel as if you are going to cut through the cover, but just cut in about 3/32" deep, start near the hole and drag the wheel away in shallow passes until you are deep enough. Make sure you cut the recess back beyond the rear of the switch, so that you have clearance for the wire and connector that sits closest to the housing. Glue the switch in using generous amounts of black RTV, it holds better and is far simpler than drilling and tapping. When I do a wire plus, this is the first step I do so the RTV is dry when I'm done.
 

Ray

Well-Known Member
It possibly took me more time to clear out the hole for the switch than it did to wire up the rest of it. Of course I was taking my time and being careful not to cut too deep or cut myself as well. I think mine has been on almost three years with no issues. Of course a little CA glue in the threads never hurts either. :D I didn't like that set screw , almost said crap, set up. It would have bugged the hell out of me because I didn't do it , if I had not have done it. I think I put a small piece of gasket material behind the switch where it goes through the cover to possibly help ease up the vibration issues.

If you can make it better , more thought out than it is ,, then just do it! :whoop:

Everything can be done better!

Ray
 

JeffM

Active Member
Welcome to the POS wire plus switch. Set screws or rtv is the most common way of mounting, ::confused:The best way for looks and durability is to machine the cover to use the lock nut as lots a members here has done.

Does the instruction you are using show the switch install with the set screws or is it missing like mine was.? If so we can send a diagram for you.
I have the instructions and have studied them for the past 3 months, the set screw methord does not attract me at all, i like the clean finish look.
Vibraton is something i did not take into account also using the original key with a relay was not concided as i had already started to attack it with the drammel tool, but a good idea.
As the new key housing is stepped i think i will keep going till the lock nut can mount flush with the thread, cut a bit of thin rubber, lock it in the RTV.
We did not work on it yesterday as i was busy at work and the lack of wire supplied in the kit ment i had to go shopping with a negitive outcome.
Try again today.
I know we have threads on the WP install but a sound methordoligy in English that non-electrical nob's can understand would be nice, i hve read and re read the instructions and i am none the wiser.................maybe i am just a dum bastard.:(
 

JeffM

Active Member
Done and installed looks like Ray's.
Happy so far, will install on bike after work today.
Thanks again guys, nice to have people with ideas and knowlage to bounce thoughts abouts and stop me from cutting my throat.
 

JeffM

Active Member
Tried to fit the coil to the cover last night, no go.
Had to move the coil sideways and drill and tap 2 new 1/4" UNC holes to make it fit.
 

JeffM

Active Member
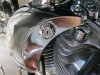
Coil cover key.jpg

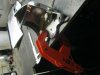
Coil cover.jpg

I fitted it so the key is flush with the locking nut.
I had to grind out so the first step of the barrell fitted snugly and i still had about 1mm of material to prevent the key from turning a good dolop of RTV was used as surgested by many on here.

The coil had to be shifted 8mm to the left to allow for the barrell to fit without touching anything, also loosen of all the top engine mounts and push the coil cover rearwards so that #1 spark plug lead does not hit, some shiming was also required................oh what fun.

It is all done and going well 100klm on it after fitting of WP big test this weekend.
 
Top