Inverted forks 02 Pro Sport Need Help.

Ernie12

Active Member
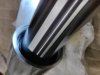
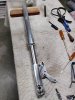
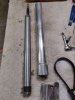
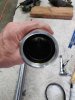
I decided to remove my forks to replace the seals. There are only old links here and I will do my best to post some pics of everything but I am stuck. I thought I would be able to slide the two tubes away from each other and remove the old seal and bushings like you see them doing on Youtube. I removed the clip but when I slide them apart it gets stuck and I have to turn it upside down and hit the bottom with a rubber mallet to get them to slide back. Does anyone know what is going on?


IMG_20180720_184854 copy.jpg IMG_20180720_193737 copy.jpg
 

Mr. Wright

Knows some things
Supporting Member
I had a shop redo mine Ernie. Maybe Shannon will give you some help. Good luck!
Thanks alot for your faith in me. I have not done the inverted forks yet, but I do have a set in my shop that does need to be done. I don't believe they would be any different than any other forks.
That being said, no they won't just slide apart. You will have to slide it out hard, sometimes several time to pop the bushing loose.
I decided to remove my forks to replace the seals. There are only old links here and I will do my best to post some pics of everything but I am stuck. I thought I would be able to slide the two tubes away from each other and remove the old seal and bushings like you see them doing on Youtube. I removed the clip but when I slide them apart it gets stuck and I have to turn it upside down and hit the bottom with a rubber mallet to get them to slide back. Does anyone know what is going on?


View attachment 59224 View attachment 59225
Have you found the thread that makes the tool to put it back together? If not give me a call.
 
I decided to remove my forks to replace the seals. There are only old links here and I will do my best to post some pics of everything but I am stuck. I thought I would be able to slide the two tubes away from each other and remove the old seal and bushings like you see them doing on Youtube. I removed the clip but when I slide them apart it gets stuck and I have to turn it upside down and hit the bottom with a rubber mallet to get them to slide back. Does anyone know what is going on?


View attachment 59224 View attachment 59225
Not sure of your setup, but check to see if there is an Allen bolt in the bottom of the fork, not the pinch bolt but one that is holding the lowers in


Sent from my iPhone using Tapatalk
 
I think it may be either located at the bottom of the forks or in the axel hole ,
You have remove the clip and seal correct ?


Sent from my iPhone using Tapatalk
 

Ernie12

Active Member
Thanks alot for your faith in me. I have not done the inverted forks yet, but I do have a set in my shop that does need to be done. I don't believe they would be any different than any other forks.
That being said, no they won't just slide apart. You will have to slide it out hard, sometimes several time to pop the bushing loose.

Have you found the thread that makes the tool to put it back together? If not give me a call.
Thanks Shannon, I thought I would be able to slide them back and forth and slowly drive the seal out but for some reason it gets stuck and I have to slam the end on a piece of wood or use a rubber mallet to make them collapse again. I also thought there would be a metal washer on top of the seal but its just the seal no washer. You can see in the first picture its just the seal, but the screw on dust cap does screw down on top of it so that probably acts as the washer.

Update..
There is a bushing, washer, seal and clip just like all the other forks.

Shannon I have a seal driver if that is what your talking about when putting it back together?

Thanks
 
Last edited:

Ernie12

Active Member
I think it may be either located at the bottom of the forks or in the axel hole ,
You have remove the clip and seal correct ?


Sent from my iPhone using Tapatalk
Nothing in the axle hole , the tube must screw into the lower part but I don't think that needs to be removed does it?
 

Ernie12

Active Member
Thanks Paul , yes they are very similar.

Both methods say to remove the lower part of the tube but to get the seal out , one version says to use a slide motion and the other to use a screwdriver to get the seal out. Scratching my head at this point. LOL
 
Last edited:

Ernie12

Active Member
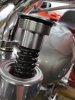
You can see on my forks you have to remove the top cap just to get the forks out of the tree because it sits flush with the top of the triple tree. That was a little bit of a struggle but I did get it off , then you can slide the spring out.

Update:
You do not have to take the cap off first if you spread the pinch area apart enough to slide it down and out. I thought the bottom of the cap sat in a grooved area on top but it is the same diameter as the tube. When reinstalling the bottom edge of the cap sits in the pinch area so i guess if you were just changing the oil you would have to loosen the top pinch bolts only to get it to unscrew. I am really glad I took pics of everything.

IMG_20180720_141407 copy.jpg
 
Last edited:

Sven

Well-Known Member
No screwdriver as a seal puller. You'll nick the fork once and there is your leak. Where Paul is pointing to, looks like the whole lower fork has a bullet end, no allen access hole, just the split for the pinch bolt. So maybe it's back to the top of the fork and remove that top cap nut. You'll have to fill the oil back up somewhere, so since you need to remove the cap, it might be the cap screwed onto the rod. Once the cap nut is off you can slide the tube down. Remove the cap off the shaft via double nutting. Then begin to pull the fork tube from the leg like you're pumping a shotgun... so you keep doing this till seal walks out of the leg. I could be wrong. And too, it looks like the fork seal C-ring is removed?

Shadetree Seal Installer:
1. With a screwdriver shaft, let the old seal rest on the shaft. With gloves on, we move next to the grinding wheel.
2. Let the seal spin off the shaft and note how much rubber leaves the OD of the seal. Stop and test.
3. The test is to let the seal drop back into the fork leg and then turn it upside down so it falls out... you just made half the installer.
4. Walk into a plumbing store like Meguyveer and veer to the pipe diameter that will slide over the fork leg, but not wide enough to drop past the fork leg, but rest on the leg's seal receiver diameter, and too, where the ground down seal won't be stuck in the ID of the plumbing pipe.
5. Buy the wide blue paint tape so you can tape tube so you do not nick the leg with the homemade installer.
6. The tube will probably drop down into the leg and that says the sliding part won't be nicked; is to install the seal this way, rather than install the cap so the leg is fully extended = Nicks galore! You save the finish of the tube at both ends with the tube drop and tape.
7. Lead fishing weights tape around the plumbing pipe acts as a large hammer blow so the seal slides down the leg with less pounding.
8. The seal has to move past the ring lock groove remember. Run the lock ring over the tube rather than spread and scratch the tube with the ring.

The oil fill is what weight and how many ounces is up to the shop manual and/or you [weight wise that is].

 

Ernie12

Active Member
Hi Sven, Thanks for the input. Yes the C-clip is removed and at this point I am trying to slide the forks back and forth like a shot-gun. Hopefully Shannon can look at the ones he has in his shop and give some insight.
 

Ernie12

Active Member
It looks like I may have to do it this way. I think the GCB forks are similar to Mean Streets forks.


Instructions for Changing Oil seals on GCB 54mm Inverted Forks


  1. 1) Drain oil from each fork leg by removing the drain screws and pumping each leg until empty. (There is no drain on the Mean Streets Forks) Loosen the (4) pinch bolts on the upper triple tree only. Use a pin spanner tool (Storz p/n FT6481A1) with a soft thin cloth to prevent scratches and just loosen the top cap on each fork leg. Remove the front wheel and fender, then remove the individual fork legs from the triple trees.
  2. Hold the exposed section of the steel fork tube (43mm diameter) carefully in a vice using aluminum soft jaws to prevent scratches.
  3. Loosen the pinch bolt at the top of the lower leg that helps lock the lower leg onto the steel tube.
  4. The lower legs are threaded onto the steel tube with a normal right hand thread. Insert the front axle into the lower leg and use it to unscrew the lower leg from the steel tube. It may be necessary to slightly warm the lower leg with a heat gun to help remove it.
  5. Unscrew the threaded seal holder from the upper aluminum tube using spanner tool (Storz p/n FT4354). The dust seal can be removed with your fingers. The oil seal is located on the opposite side of the seal holder. Remove the wire retaining ring and spacer washer (if present). Place the seal holder on a soft piece of wood covered with a cloth and drive the old oil seal out of the seal holder using a screwdriver or similar tool. Press the new oil seal into the seal holder with the spring side of the seal facing you. Reassemble the spacer, retaining ring, and dust seal. Put some thin packing tape over the fork tube threads to protect the new oil seal and reinstall the oil seal holder.

    If you intend to replace the fork bushings also, proceed as indicated.
  6. Remove the threaded cap at the top of the fork tube using the pin spanner and a soft piece of cloth to prevent scratches. This will expose the fork spring and cartridge rod. Loosen the jam nut on the cartridge nut and remove the top cap from the cartridge rod. The complete cartridge and spring assembly can be removed from the bottom of the steel fork tube. NOTE: It is not necessary or advisable to disassemble the cartridge unit.
  7. You can now remove the steel tube by pulling it out from the bottom of the upper aluminum tube. Pull on the steel tube in a slide hammer motion. This will force the lower guide bushing out from the upper tube. The upper bushing is located on the top of the steel tube and can be removed by carefully expanding it and sliding it off of the tube. Install the new bushings and reassemble the fork in reverse order.
  8. When you are ready to reinstall the lower legs, use a small amount of Loctite 565 Teflon Pipe Thread Sealant on the threaded portion of the steel tubes.
 
Last edited:

Sven

Well-Known Member
Earnie's photo: Pull the spring down, or force the open end wrench in between the cap and lock nut on the shaft. Count the turns of the cap as you hold the lock nut steady. You'd be surprised how much a few mm on the suspension makes. Which now causes the fork's axle to not line up from fork to fork. The tick to this is simple. The one fork is locked in the triple-tree. The other fork slides up and down with the aid of axle in place... sort of. So you sort of feel for the least amount of drag on the threads. And that means you could twist the axle in with two fingers = Zero Drag, between leg to leg.

Fork Leg Theory:
1. If the ideal fork had matching thread lengths, hole to hole, etc., you'd still have to float the one fork to X to Y; X being the horizontal; Y being the vertical.
2. If real world lengths running in different mm, we are still running a length from cap to rod to axle hole.
3. So the trick is back to running the axle square to the legs = Z [the triple is squared to the legs to the axle].


Ernie12

Active Member
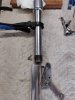
Hey Shannon , Figured it out--- you have to take the bottom of the fork off with a little help from the heat gun I was able to unscrew it holding the tube with the rubber wrench and just using my hand to unscrew it. It was a little tight but not bad the heat helped. Now you just slide the tube out the top of the larger one and everything is exposed. Now I just have to get the seal out maybe with a seal puller or something similar.

IMG_20180721_121607 copy.jpg
IMG_20180721_121839 copy.jpg
 

Sven

Well-Known Member
Ah, the old tube out of the leg. Maybe I was loopholing a step? Not familiar with the teardown to think out a loophole.

Edit: Now that I see said design, no loophole possible, sans scratch up the leg. Brake clean every part, threads included. Why? The debris at the bottom of the fork... Is it powdered gray aluminum (normal wear)? Or is it deterioration of the slider collar fiber, brass this or that going belly up.
 
Last edited:

Sven

Well-Known Member
Drywall nail = Sharp tip, wide pitch, sharp threads:
1. Hammer in 2 nails at 3-9 o'clock then screw them in.
2. Vice grips on both nail shafts and pull up equally.
3. Fulcrum points are the leg's OD area and should have something like thick flattened coke or beer can material at the pivot points. The pivot will crush the can rather than ruin the fork's finish at the pivot points.
 
Top