Stock speedo rubber buttons

Energy One

Mr. Wright

Knows some things
Supporting Member
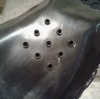
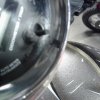
Alright, their almost here. I finally got around to getting the mold made for the rubber buttons.
I did a test pattern with 9 buttons, and will do the rest once we get them right.
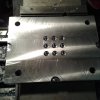
20170727_163536.jpg
Sorry, I didn't take a picture of the other plate.
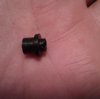
Anyway, I took it over the my rubber man, and he ran a couple test runs.
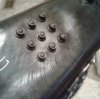
20170808_202513.jpg
20170808_202521.jpg
20170808_202458.jpg
20170808_202444.jpg
I have a small problem at this point. The rubber he uses, is a bit stiff. He has some softer stuff, but it's red.
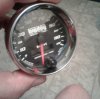
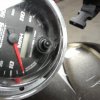
When I put it on the speedo, it will push the reset, but I'm afraid it will break the glass. So I'm going to adjust the mold a bit and try again tomorrow. Getting a softer black rubber will be to expensive, so if this doesn't work, the buttons will have to be red.
I'll keep you posted.
 

Mr. Wright

Knows some things
Supporting Member
Porsche charges extra for the red buttons and seatbelts
I was just sitting here trying to figure out how he separates the buttons out of the sheet. And if I have to cut each one out with a pair of scissors, their going to cost more.
 

Psycho

Psycho
You might try to reduce the flange thickness of the larger diameter that meets the glass by 30 - 40 percent, as it would help with the compression ratio ... just a thought. Seems that that flange should be more of a seal to the glass rather than a support flange. GREAT JOB THOUGH !:cheers:
 
Last edited:

HMAN

I just like my Freedom
Supporting Member
I seem to remember some threads on the old site that delt with replacing the glass? After looking at my 04 speedo, I dont see anyway to disassemble it? Any threads left that speak to that....Ive searched but come up empty....tia. My button is ok but lens is cracked.
 

Mr. Wright

Knows some things
Supporting Member
You might try to reduce the flange thickness of the larger diameter that meets the glass by 30 - 40 percent, as it would help with the compression ratio ... just a thought. Seems that that flange should be more of a seal to the glass rather than a support flange. GREAT JOB THOUGH !:cheers:
I thought of that, but I'm going to shorten the inside first. thanks
 

Th3InfamousI

Administrator
Staff member
What do you recommend doing to eliminate the same problem from happening to the new buttons?
I don't think that's the goal. Rubber will crack after a few years no matter what. Just creating to have a source of buttons for folks so they don't have nothing showing.

I love the analog speedometer myself

Sent from my 2PS64 using Tapatalk
 

bruce

Active Member
I used a rubber cap that goes on a cars brake caliper bleeder and wheel cyl. I glued it on with weather stripping glue. it has been on now for a couple years and works fine. there are different types of these caps, I used the one with a rim all around the edge - it almost looks just like what is being made here on it post.
 

Mr. Wright

Knows some things
Supporting Member
After talking to the rubber man today, I'm redesigning it a little bit. So I welded up the mold and re-machining it. Hope to have it back to him tomorrow for testing.
 

BWG56

Guru
I don't think that's the goal. Rubber will crack after a few years no matter what. Just creating to have a source of buttons for folks so they don't have nothing showing.

I love the analog speedometer myself

Sent from my 2PS64 using Tapatalk
Goal? the problem is not cracking, its the reset stick wearing thru the top of the button.

The analog was always bouncing +/-5mph and they die anyway
 
Last edited:

Mr. Wright

Knows some things
Supporting Member
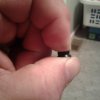
Second test run works great. Don't get in a hurry yet, I still need to finish out the mold for a production run. I do not have a price yet. When they are available, you will be able to order them from the Kaptin for the same price I'll have them for.

Instruction on mounting them.
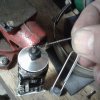
1. When your old button come off, it may leave a small piece in the hole. If you try to dig it out, you may crack you glass, so just take a small pick, and push it to the inside.
20170810_132217.jpg
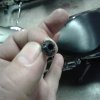
2. clean the glass, then take a tooth pick or paper clip, and put a small amount of black silicone on the button, being careful not to get any in the center hole.
20170810_132325.jpg
20170810_132448.jpg
3. Press in place.
20170810_132518.jpg
I'll let you know when they are available.
 
Top