zenBD
Active Member
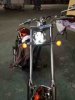
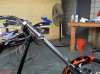
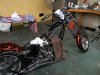
I had a new headlight shell ready to replace a deep scratch on my existing headlight shell, a new LED ready to go in, and a dakota digital with a newly chromed shell and mount to install. I've been trying to do more work on the bike myself, because every time I leave it with someone I wind up sorry for it. So, I took a few pictures to show what I did for anyone thinking of doing these things. I cannot seem to get pics to load on the page, so I'll have to just add them as attachments. Maybe Franco will help me out with this.
1) pulled the tank off after wrapping the existing speedo to defend against dings. The tank was a pain to get off of the rubber nub on the back, but it popped after some careful convincing.
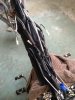
2) located the wire connection and separated it. Meanwhile I dielectric greased and shrink wrapped all other connections other then the speedo.
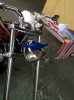
3) I hung a wire from the ceiling with blue take on the end to locate the vertical orientation of my old headlight shell so that I could install the new one at the same angle.
4) I had already installed the LED into the shell, which was a royal pain in the ass, even though it is plug n' play. It was really hard to push the three pin connector on the HD LED into the BD harness. Just when I thought it was going to break from pressure, it popped in (that's what she said).
So, then I removed the old shell, bolted on the shiny new one with the LED, and used my blue tape & wire to locate the vertical angle for the new shell. Loctited and torqued down the bolts. I plugged in the new pigtail and tested her out... Success!
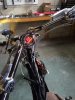
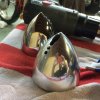
5) Went on to the speedo. It was not simply swapping the old analog for a Dakota, I was also changing the shell for the new chrome one, so I had to disconnect and remove everything including the mount. To my surprise, the wiring for the speedo along with the white connectors slid back through the triple tree without much difficulty.
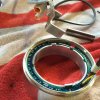
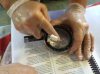
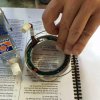
6) Took apart the speedo shell, and found the LED RPM cluster & circuit board snap ringed into the shell. This was a bit unnerving, but My buddy Chris (who had been my second set of hands up until now) was able to carefully work his way around the ring with a screw driver and pop the ring out. There was also a foam gasket in the speedo face ring that I had to carefully coerce out with a tiny flat head. Too much zeal here would easily ruin the gasket. I then installed it into the chrome one. Under the RPM indicators was a rubber gasket, this had to be removed along with the plexiglass face with the idiot symbols on it. The plexiglass was in there tight... It had to be rotated and very carefully motivated out one little bit at a time. We then had to be careful to properly line everything up to go back into the chrome shell in the proper orientation.
6) I put the parts in the new chrome speedo cover and installed the dakota digital. This part was really easy, as it would have been if I wasn't changing shells... Truly plug n' play. I dielectric greased all connections and shrink wrapped them. I also dielectric greased the back of the circuit board.
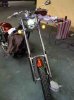
7) Bolted and loctited the whole shebang back on the bike and tested for power... All was good!
Sent from my iPad using Tapatalk HD
1) pulled the tank off after wrapping the existing speedo to defend against dings. The tank was a pain to get off of the rubber nub on the back, but it popped after some careful convincing.
2) located the wire connection and separated it. Meanwhile I dielectric greased and shrink wrapped all other connections other then the speedo.
3) I hung a wire from the ceiling with blue take on the end to locate the vertical orientation of my old headlight shell so that I could install the new one at the same angle.
4) I had already installed the LED into the shell, which was a royal pain in the ass, even though it is plug n' play. It was really hard to push the three pin connector on the HD LED into the BD harness. Just when I thought it was going to break from pressure, it popped in (that's what she said).
So, then I removed the old shell, bolted on the shiny new one with the LED, and used my blue tape & wire to locate the vertical angle for the new shell. Loctited and torqued down the bolts. I plugged in the new pigtail and tested her out... Success!
5) Went on to the speedo. It was not simply swapping the old analog for a Dakota, I was also changing the shell for the new chrome one, so I had to disconnect and remove everything including the mount. To my surprise, the wiring for the speedo along with the white connectors slid back through the triple tree without much difficulty.
6) Took apart the speedo shell, and found the LED RPM cluster & circuit board snap ringed into the shell. This was a bit unnerving, but My buddy Chris (who had been my second set of hands up until now) was able to carefully work his way around the ring with a screw driver and pop the ring out. There was also a foam gasket in the speedo face ring that I had to carefully coerce out with a tiny flat head. Too much zeal here would easily ruin the gasket. I then installed it into the chrome one. Under the RPM indicators was a rubber gasket, this had to be removed along with the plexiglass face with the idiot symbols on it. The plexiglass was in there tight... It had to be rotated and very carefully motivated out one little bit at a time. We then had to be careful to properly line everything up to go back into the chrome shell in the proper orientation.
6) I put the parts in the new chrome speedo cover and installed the dakota digital. This part was really easy, as it would have been if I wasn't changing shells... Truly plug n' play. I dielectric greased all connections and shrink wrapped them. I also dielectric greased the back of the circuit board.
7) Bolted and loctited the whole shebang back on the bike and tested for power... All was good!
Sent from my iPad using Tapatalk HD
Attachments
-
 18.5 KB Views: 38
 -
 192.1 KB Views: 35
 -
 189 KB Views: 30
 -
 15.7 KB Views: 30
 -
 181.5 KB Views: 30
Last edited: