How To Service your Big Dog

Status
Not open for further replies.

Gas Man

Cool isn't cheap
Calendar Participant
The lets work on some of the little stuff.

Lube your cables.

Clutch.

Spray the clutch cable at the top by pulling the lever in and spraying in the cable lining


Spray some lube down the top of the cover to help slide it up and out of the way.


This is what you'll see


Gas Man

Cool isn't cheap
Calendar Participant
Loosen the lock nut and spin the clutch cable loose


Spray some lube in the hole. I do this many times to allow it to work down the cable.


Also lube your throttle cables. Only one spot to get lube down the cable... at the grip. Loosen the lock nuts and spin the cables free. You'll have to do one at a time cause it will tighten the other. I do this about 4 times just like the clutch.


Brakes are a vital piece to the whole puzzle. So not only will we inspect the pad wear on the front and rear. We will ensure proper use by observing the caliper functioning up close. This may require somebody else to press the appropriate lever. Then we will remove the reservoir covers and make sure both are full.
 

Gas Man

Cool isn't cheap
Calendar Participant
Front:


Rear:


Get your air filter set right.
Removing your teardrop cover to gain access to the filter.


This would be a used/dirty K&N. I will simply clean it and re-oil it. But your paper filter may look similar and needs to be replaced.


Gas Man

Cool isn't cheap
Calendar Participant
Beverage time.

By now you should have your throttle cables put back together and adjusted the free play. Now lets check to make sure it is working properly and that your jets are spraying correctly.


I usually have to clean this off a bit. But with the filter off it will give you a good chance to check the jets and lube the throttle cables that are hooked to the side of the carb.

Plus ensure that your throttle is closing and opening freely. It is good to check it with your bars turned both ways to ensure no binding.

Onward to the oils...

Check your oil level and condition of your engine oil by pulling the dipstick. Ensure when always checking oil level that the bike is level and off the kickstand.


Lets first drain the engine oil. Pull the oil plug from the bottom of the oil tank.

Left/kick stand side of the bike next to the rear end of the rear shocks.


Inspect the plug and the metal fragments on the end of the plug. The plug is magnetic to catch shavings from your motor oil.
 

Gas Man

Cool isn't cheap
Calendar Participant
While that is draining. Pull, check and clean your tappet screen. It is located on the right/exhaust side of the bike. Above the oil pump and in front of the drive belt pulley.


Remove with some needle nose pliers but use caution. It should come out with ease.


I clean it with brake clean and let it air dry for a min. Enjoy a beverage!

Re-install the tappet screen. This takes a bit of finesse. First try it with just the nut cover so you get the feel for how it goes in. Now try it with the screen and the spring. I used a socket and extension to aid putting it in. Use one hand to keep pressure down and the other to spin.
 

Gas Man

Cool isn't cheap
Calendar Participant
If the oil is done draining from oil tank. Put the plug back in. I like to use a dab of high temp rtv silicone on the plug to ensure a good seal. And torque it to specs (10ft lbs) then refill the oil with 3 qrts of oil of choice.


Now time to remove the engine oil filter.

Remove crank sensor. Clean and inspect.


This allows for easier removal of the oil filter.

Beware. You may want something to catch this oil coming out soon. Or a lot of rags for clean up or both.
 

Gas Man

Cool isn't cheap
Calendar Participant
Spin off...


OPTIONAL PHASE for those with a Scavenger Complete Oil System
http://www.roguechopper.com/

Spin on scavenger unit.


Start bike at idle and pump out the rest of the old oil that is still in your system. I removed about an extra quart of black dirty oil.

See what you're wouldn't be getting out.
 

Gas Man

Cool isn't cheap
Calendar Participant
This is at about a 1/2 a quart into the evacuation of the old oil


Now onto what we all have to do...

Remove your new oil filter from the package, apply a little bit of new oil to the new oil filter o-ring and spin onto the bike.


Check oil level in oil tank top off as necessary. Start bike again to wet down the system. Allow to set.

Time to have another cold beverage.

Check oil level again and top off as necessary. Remember it’s easier to keep adding a little versus trying to remove if you add too much.
 

Gas Man

Cool isn't cheap
Calendar Participant
Tranny oil.

Going to need to fab something to catch the oil coming out of the tranny. I cut up a old 2 liter plastic pop bottle.


Also get your 20 oz of tranny oil ready. By pouring out some from a full quart to a old quart. Like so...


Pull the tranny dipstick and check the oil level and condition.
 

Gas Man

Cool isn't cheap
Calendar Participant
Pull the tranny drain plug. Located under the bike just in front of the front drive belt pulley.


As you are spinning the last few threads off on this drain plug.. have your pan or 2-liter catch ready... like so...


Gas Man

Cool isn't cheap
Calendar Participant


As this is draining pull, inspect, clean, and re-install your speedo sensor. It is located under your seat, in front of the starter, on top of the tranny.


Enjoy a cold one. The tranny oil is thick and drains slowly unless warm.

Replace drain plug into the tranny and consider using the dab of silicone as stated above with the engine oil drain plug.
 

Gas Man

Cool isn't cheap
Calendar Participant
Now add your 20oz of tranny oil in thru the dipstick hole like so.


Primary time

Remove inspection plate to check level and condition of the oil.


Now you may notice that I removed the sponge and filled the seeping hole on the top with silicone. There is no need for it with the eyehole breather on the backside of the inner primary.

Lets continue.

You can see on these new 2006 models that you can hardly inspect the chain lash/free play or much else. The derby covers are decorative and don't remove to gain access. So I always remove the outer primary if any adjustments are needed to the primary chain.

Either way, we need to drain the oil. By simply removing the primary oil drain plug located towards the rear of the bike just in front of the kickstand.


Gas Man

Cool isn't cheap
Calendar Participant
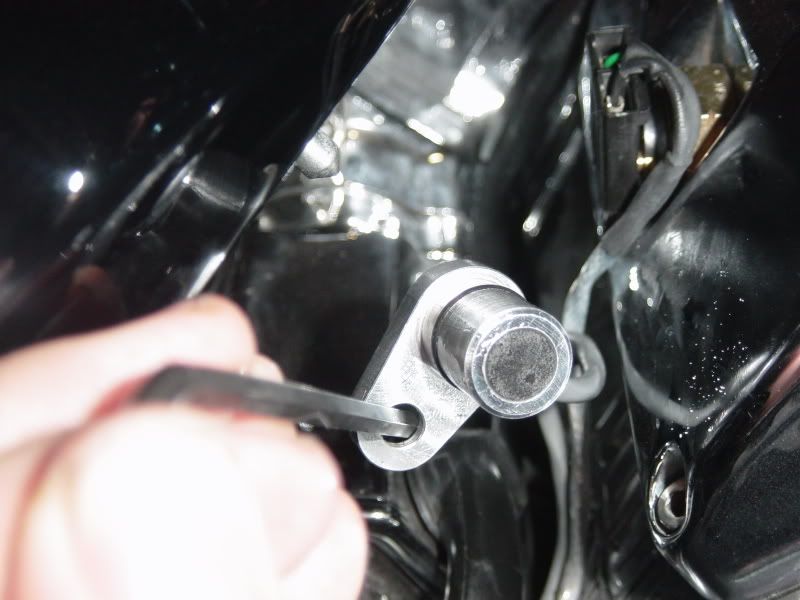
Inspect the drain plug and its magnet. Take notice to the shavings on it as well.


My bike is still pretty new and this being the end of my riding season decided to pull the out primary. Be prepared to have excess oil come out as you remove this cover. Have rags handy!


Should probably have one last beverage of choice before finishing.

Check the chain lash/free play and adjust using the nut in the center of the primary. The chain should have from 5/8 - 7/8 inch of lash/free play at its tightest spot.

Clean the inside of the primary and its outer cover. Inspect and replace as you see needed the outer primary cover o-ring. Mine looked good so I just dabbed a little silicone around it and place the cover back on the bike. Torque the cover bolts to 108 inch lbs or about 9 ft lbs.


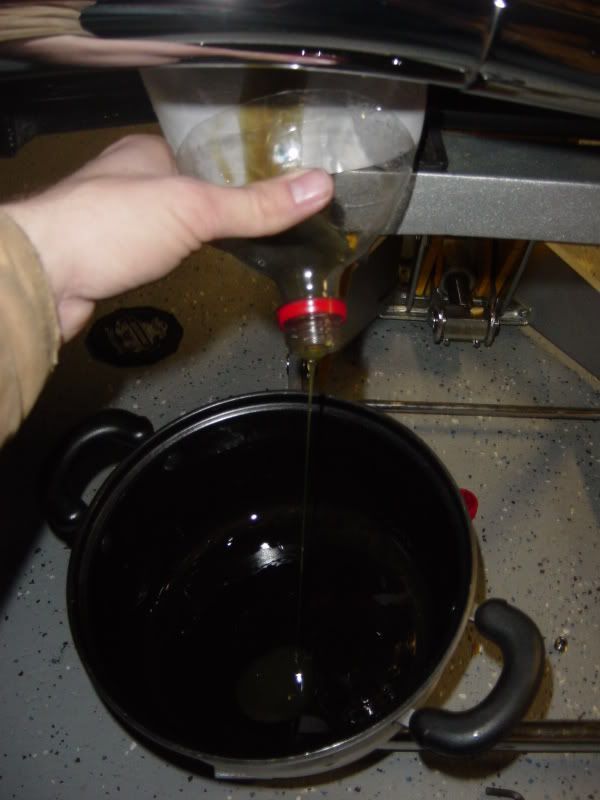
Add 1 quart of primary oil to the primary thru the inspection hole.


Replace the inspection cover and torque those to the same torque specs as the outer primary cover bolts.

Finish off that 6-pack right about now.

Now as I said I was winterizing. So I also before all of this ran fuel stabilizer thru the gas tank for a good 5 miles prior to this service. Then once done with all of this. I remove the spark plugs and spray a small bit of penetrating spray lube into the cylinders. You can use a lot of different kinds from WD40 to the same lube you use on the cables. Just a bit of something to sit on top of your piston rings during its winter slumber. I also put the battery on a battery tender and cover the bike. If you have a lift I suggest storing it there to keep the tires off the cold ground.

In the spring, I will start the bike. Bring it to temp. Check for leaks. Check the tire's air pressure. Take it for a small spin around the block. Check again for leaks. If all good. Take it for a healthy ride. Once you return and the bike cools. Replace the spark plugs.

I tend to run a few tanks of gas on the "winterized oil change" then change that oil again just as stated above. Then you and your bike should be ready for a good riding season.

I hope this helps or at least gives some different perspective. I'm not endorsing my method over anybody else’s or any of the products shown. I just thought it would help for all those guys that a bit scared to work on their $30,000+ bikes. It’s simple and easy. Can be done within an afternoon even with beverage breaks and done with a normal set of tools.
 
thanks gasman just did my service step by step,I do have one question about the primary,you stated one quart,I read in the manual 48 oz are required,if I need more I'll I'll run to the store.
 

Raywood

The Pirate
Staff member
Calendar Participant
Troop Supporter
thanks gasman just did my service step by step,I do have one question about the primary,you stated one quart,I read in the manual 48 oz are required,if I need more I'll I'll run to the store.
Not to answer for Gas Man Jeff but that was a corrected misprint in the manual.

The REV A copy of the manual states 32 oz as Gas says. I have even gone as low as 20 with permission from the dealer when I was having lots of starter leak issues.

There is a post on the updated manual revision in this forum section.

:flag:


Here it is:
http://www.bigdogbiker.com/forums/general/1449-05-service-manual-updates.html
 
Last edited:

Raywood

The Pirate
Staff member
Calendar Participant
Troop Supporter
thanks raywood,this was the break in fluid change,almost 700 miles and I couldn't believe the metalics I got from the tranny.
Surprised you found an 05 with only that many miles on it!
Then I would do it again sooner than the 2500 mile point as some of the early 05's had clutch problems. Mine is number 29 and I'm on the original clutch even after 50,000 miles but it's something you will want to watch on this model.

Later,
Ray
 
thanks for letting me know about tranny problems ,the # on mine is 015067,and the bike only had 367 miles when I got it.The original owner has about 60-70 bikes in his collection,and traded this one in on a 08.
 

Raywood

The Pirate
Staff member
Calendar Participant
Troop Supporter
thanks for letting me know about tranny problems ,the # on mine is 015067,and the bike only had 367 miles when I got it.The original owner has about 60-70 bikes in his collection,and traded this one in on a 08.
If the 5th digit on the long line is an "N" then you frame is made by Rolling Thunder. If it an "T" it's made by Daytec.

Looks like your bike was the 67th of the assembly line for that model! If you look on the opposite side of the frame from you VIN you will see a letter followed by 4 digits. Mine is N5029! N meaning Rolling Thunder frame and 5 for the Year and then the production nunber.

:flag:
 
Last edited:

Gas Man

Cool isn't cheap
Calendar Participant
Do the screw driver thru the old filter and spin off!

And as far as a new filter... get a K&P from Jake. They rock and save money in the long run.
 
Status
Not open for further replies.
Top